
Creating 2D maps
Soon you will be able to either import your maps directly or create one from scratch in our built-in 2D editor, but while we are working on making that happen for your comfort, there are some easy steps that you could follow along to successfully complete your 2D Wayfinding solution by yourself.
First step is the map. When you design your map in 3rd party software, for example in Illustrator or Inkscape. Then it’s important to keep some things in mind
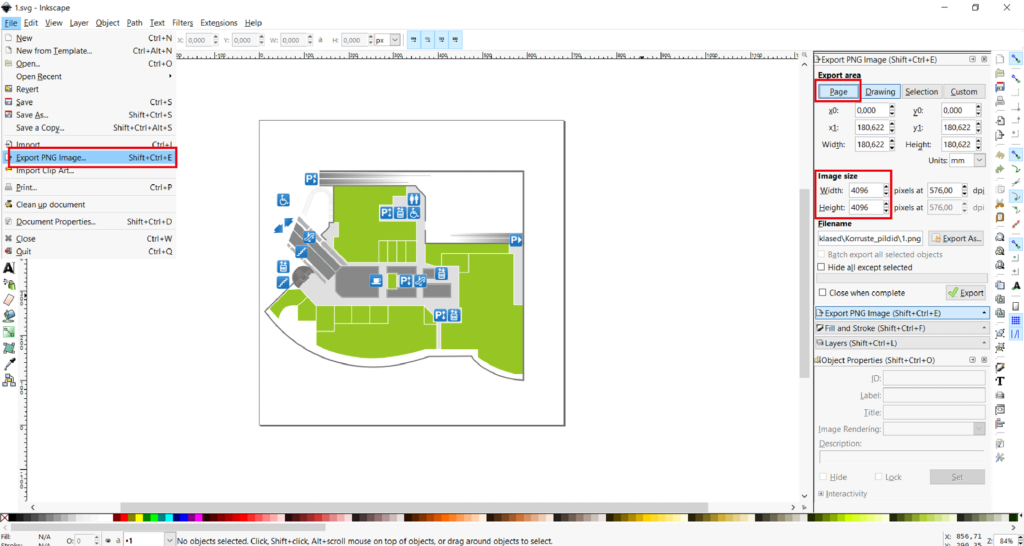
- The map needs to come in 2 formats if you intend to have active clickable meshes on the wayfinding solution. When the design is ready, prepare a 4096×4096 PNG image with transparent background and an SVG file (refer to point 4 in the tutorial for further information) of the same map. If only paths are necessary without clickable areas then svg will not be necessary. Repeat this process for all floors.
- Name the files simply, just floor number will do just fine
- The map design needs to be on a square base and as centered as possible. The background should to be transparent, so that it would blend in well with the template
- If multiple floors are used, make sure that the floors align well, when placed on top of each other
Uploading the map under Floors > Floor plans
- Upload the PNG images under the floor plan menu
- In the upload window select the file, upload and wait for the window to show that upload is complete. Then close that window, wait a minute or two then refresh the screen. If the status says “Ready” then everything is nicely uploaded.
- If the project has multiple floors then add a floor from the top and repeat that process.
- Should the status window say something other than “Ready”, then there might be a few things that could have gone wrong. First wait a bit and refresh, if it is still not ready, then some error could have occurred in the upload. The upload may have been closed before the upload was ready, or the file size is too large. The smaller the file size the better. In that case select “replace” and repeat the process, make sure to select “replace material” as well and have a slightly longer waiting period after closing the upload window and refreshing the screen. If the problem persists, try logging in and out and try again.
- When replacing floors after some changes are made to the map, make sure that the new floor png has the same name as the file before that did
Upload the csv location sheet under Locations > Upload locations. Refer to Location sheet export and import tutorial for further guidance. Or upload locations manually from “New Location”
Requirements for the SVG file and some workflow details on creating maps. There are a few things that the svg needs to have in order for the map to have interactable meshes that are linked to the locations
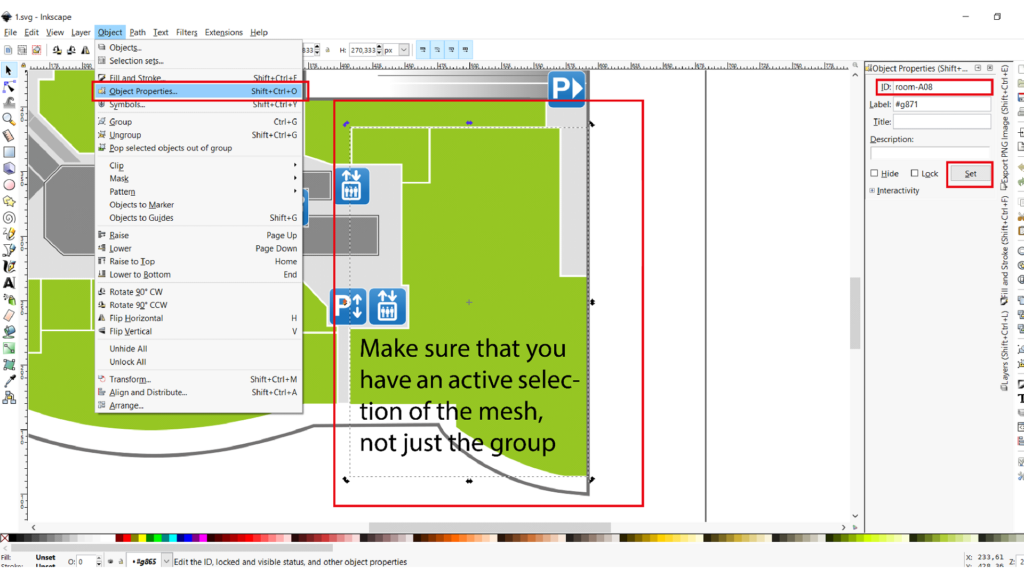
- The individual meshes that represent a location need to have a ROOM ID assigned to them within that software that you have created them in.
- That room id needs to be the same one that is assigned to the location it represents on the map.
- The format of room ID needs to be in the form of “room-XXXXX”
- For example you have created a location “Example” you have assigned a room ID to it while creating it manually, or have filled it in under room_id column in the csv table import. That ID is B46. In the map creation file the ID of the mesh therefore needs to be room-B46
- Assigning room IDs depends on the software that you are using. Illustrator unfortunately does not support adding room IDs. We recommend using “Inkscape” for adding IDs, it is free and adding IDs is easy. Just open the file in the software and assign it, then save the changes.
As Inkscape is free and open source, we recommend that for building the maps. There are a few thing to keep in mind, that we would like to point out
- Only standard polygons are supported. Therefore all shapes must be comprised of “straights” not curves, boxes and circles
- When using boxes or circles then makes sure that you convert them to a path afterwards: Path -> Object to path
- When you are using curves the convert them afterwards: Extensions -> Modify Path -> Flatten Beziers -> 0.1 on
Even if you did not build the maps in inkscape, we recommend that you always finalize the maps in Inkscape as it has great SVG support. If you build your map in Illustrator then import your AI floor file to Inkscape for finalizing the room IDs and easy export of PNG floor files and SVGs. Here is a quick overview of the process if the map is made in Illustrator, but finalized in Inkscape
- Creation of vector graphical maps in Adobe Illustrator, on a square shaped artboard
- Creating separate .ai files of aligned floors
- Opening .ai file in Inkscape
- Assigning room ID’s in Inkscape. This menu can also be accessed with a right click on the polygon
- Exporting 4096×4096 png files from Inkscape
- Save svg file from Inkscape
- Repeat process for other floors
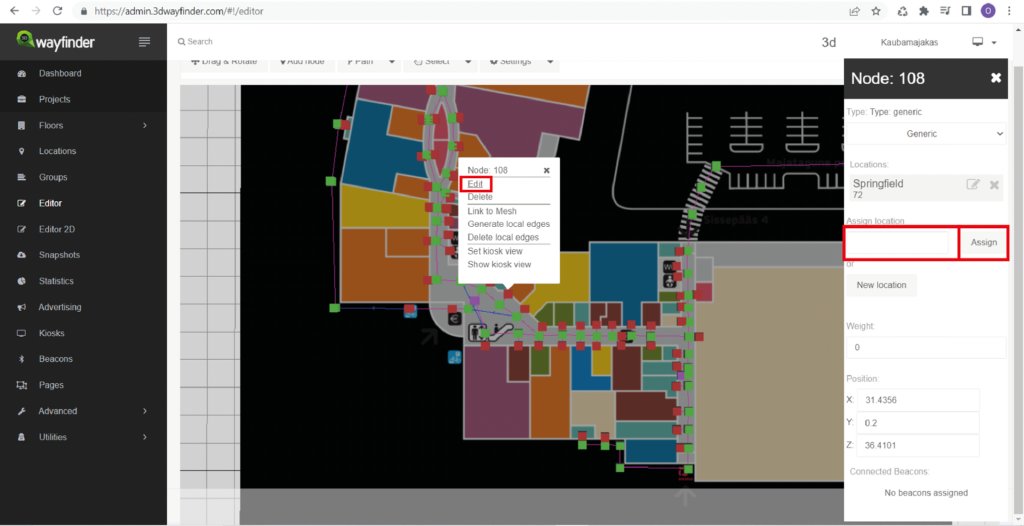
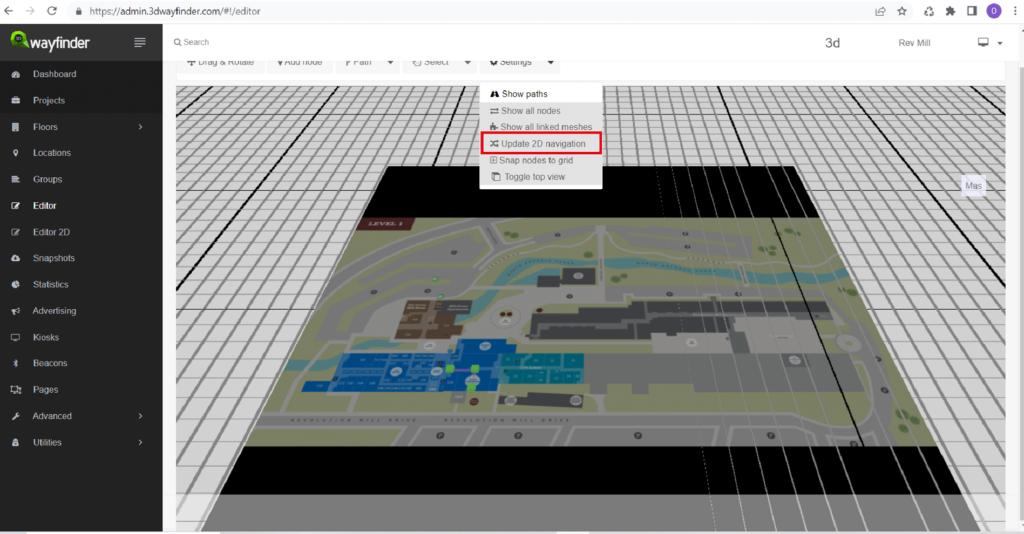
With the floor maps and locations uploaded, it’s time to create the nodes and paths in the editor and link corresponding locations to the node. Refer to tutorials about the editor to help with the use of it
The nodes scale along with the zoom, but in case of larger maps the default zoom may not be sufficient. In that case Go to Advanced > Settings > Camera > Distance > camera.distance.min – This adjusts the camera clipping plane and enables you to zoom in more
The final step for finishing your map and adding clickable meshes to your project is uploading the svg’s of your floor plan. For that you will need our assistance for now.
Just send us an email at “support@3dwayfinder.com” that contains the svg’s and make sure that you include your project number as well, we will upload the svg files as soon as possible
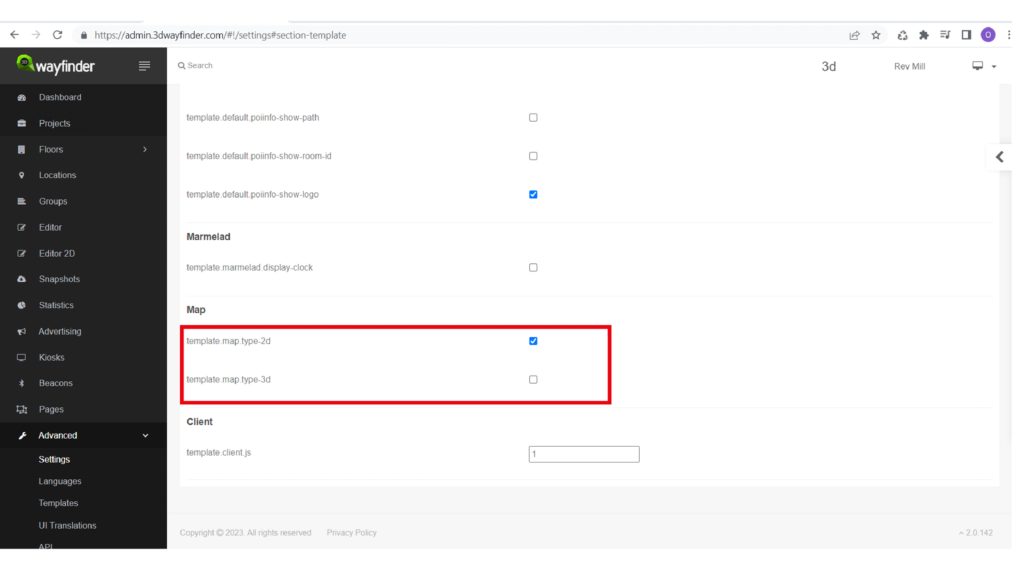
As we work with 2D and 3D there is a setting that must be toggled to view your 2D map in a default template, because 3D is the default option. That setting can be found under Advanced > Settings > Template > Map > template.map.type-2d. Make sure that only that setting is selected. Or append ?mobile=1 to the end of the URL.
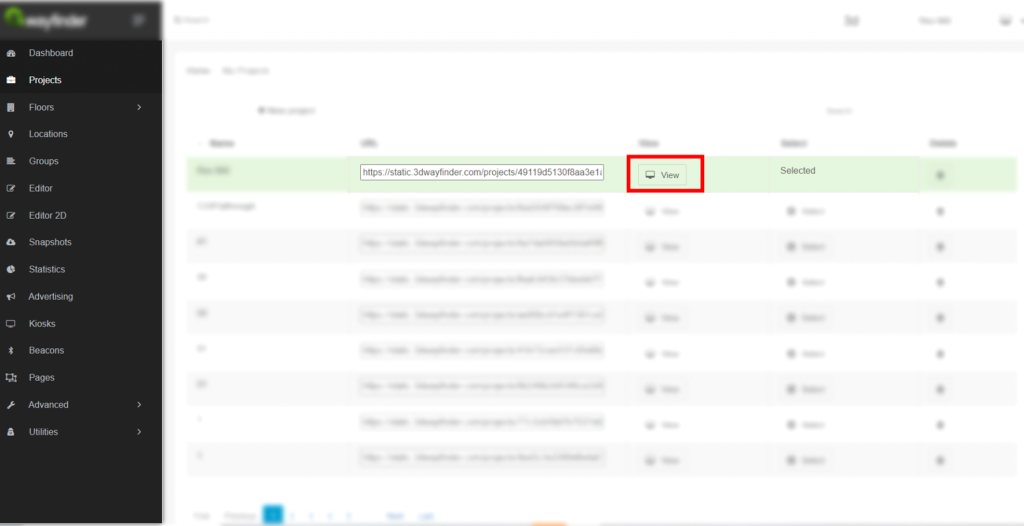
To view your project in the default template, select “View” from the projects tab
There are various options in the settings panel for adjusting the path to your liking.
- Advanced > Settings > Path > 2d > path.2d.size – Sets the size of the path elements in 2D wayfinding applications
- … > Path > 2d > path.2d.stride – Sets the distance of elements that the 2D path consists of
- … > Path > 2d > path.2d.speed – Sets the speed on 2D path
- … > Path > 2d > path.2d.color – Sets the color of 2D path
- … > Kiosk > Yah > kiosk.you-are-here-image – Set image for the you are here icon to represent the location of the kiosk (use png with transparent background
- … > POI > 2d > poi.2d.overlay.color– Active location ceiling color
- … > POI > 2d > poi.2d.name.color – Text color that is used for locations on map
- … > POI > 2d > poi.2d.fit-to-overlay – Fit location name or in the center of the location ceiling (2d)
- … > POI > 2d > poi.2d.display-names-always– When location has “always visible” checked under the locations panel, then this settings places only names on top of location ceilings, ignoring the logos. Default setting puts logos and if the logo is not assigned then text.
- … > POI > 2d > poi.2d.overlay-group-color– Assign a color to the location ceiling that is determined from the groups color that the linked location is part of
For different template options contact our sales department at rainer.saar@3dwayfinder.com
A few reminders and common occurrences
- If you update the paths or make some changes in the node placement then make sure that you also update that from the editor
- If you change the maps then make sure that the new png file has the same file name as the one before it did
- If the map change affected the meshes for locations. For example a location was split in half. Then make sure that beside just updating the png floor, also create a new svg that has the room IDs updated according to the new locations. Then send us the email at support@3dwayfinder.com in the manner that was brought out before, give us a project ID and svg’s and short description of the situation and we will update the svg meshes
- To view changes on the map while making them, have the map open in another tab and refresh the page to view the change, clear cache if necessary