Floors
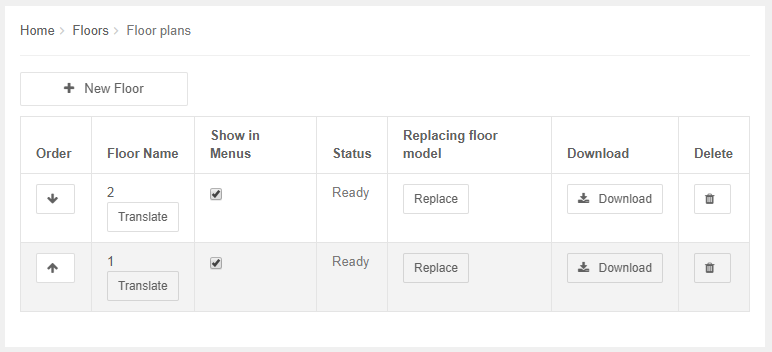
To add a floor, go to “Floors” and then select Floor Plans. To upload a new floor click on “New Floor” button. Then drag and drop 3D floor plan files or select files from the folder. You can close the dialog box after the check mark appears. The floor will have the same name as the uploaded file, you can change that by clicking the “Translate” button.

Supported file formats are: .dae, .lwo and .3ds. Read more about map creation from 3D Wayfinder webpage.
All added floors are shown in the floors table. Here you can change the order of floors by clicking on the arrow buttons to move floors up and down in the order. “Show in Menus” column shows whether the floor is shown in floors menu or not.

Translate button opens translation dialog, where it is possible to insert floor names or numbers in different languages and also edit current floor names. To add more languages, you need to go to “Advanced” and choose your wished languages.
“Replace” replaces the floor file, “Download” downloads the file and clicking trash-bin icon deletes the floor permanently.
2D floor plans
3D Wayfinder also enables to add common image files for floor-plans. When you don’t need 3D effects and the ceilings/floors don’t have to be clickable, you can upload image of the floor plan to 3D Wayfinder.

