3D Wayfinder Map for Free – Yes It Is Real Deal!

November 8, 2022

The summer is over, yet 3 Wayfinder has really warm news for you. Old or new clients it doesn’t matter our great offer is for all of you. Planning indoor positioning and navigation projects? Then this the right time to get 3D wayfinder map for free, lower your project cost or as resellers you can earn more profit!

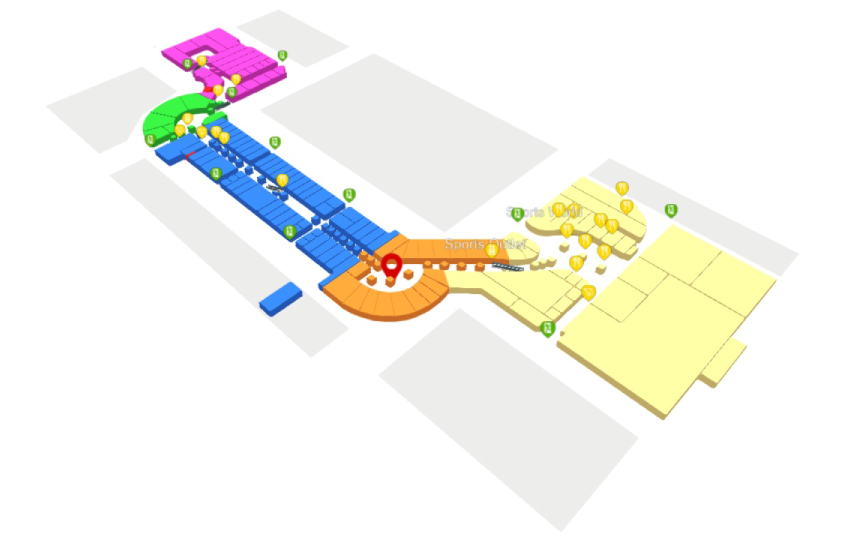
3D Wayfinder 3D Lite map sample. This how one simple mall can look in low detail 3D. It is well suited for low to mid size budgets.
3D Lite map

Free 3D map campaign started at 3rd of Nov. and lasts till 24th of Dets. 2022.

Free 3D map campaign conditions:

When you order full solution from 3D Wayfinder you will get free map development up to 50-150 rooms depending on detail levels you are interested in. This could be entire mall first or first and second floor. It depends of course mall size but it gives understanding how much of 3D modelling work you will get completely free.

To apply discount: you need to order standard solution that includes software lifetime licenses, kiosk UI template/custom design, data entry and 2D | 3D Lite | 3 Standard map.


2D map is up to 150 rooms for free;

3D Lite map is up to 100 rooms for free;

3D Standard is up to 50 rooms for free;

Check out our 3D Lite detail levels HERE

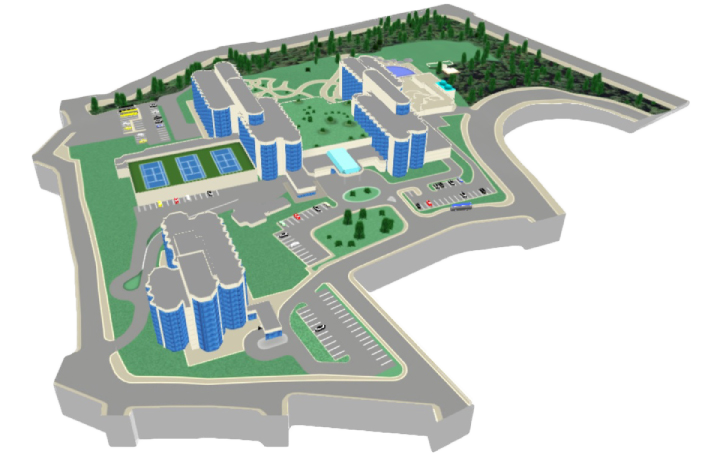
3D Wayfinder 3D Standard map sample - how one 3D standard map with buildings can look.
3D Standard map


How much will we save if we order free 2D or 3D map?

You can save up to 900$ from final price, that is considerable amount when taking account average 3D Lite Wayfinder solutions cost around 4500-5500$.


Are you ready to talk more about your project and get free map?

Get quote HERE

Or contact our sales HERE


Additional information that is useful to learn

Our hardware needs you can find HERE! 3D Lite and 3D Standard maps need more powerful hardware than 2D maps. So make sure you use right players in your kiosks!


back your investment, shortly about 3D Wayfinder powerful advertising module HERE We make sure you have all the tools to earn back all your investment. Especially useful for malls and business centers were a lot of brands and offices are located.


Looking to get walkthrough for our DEMO?

Contact us at sales@3dwayfinder.com

« »

Building Kiosk for 3D Applications

May 12, 2017

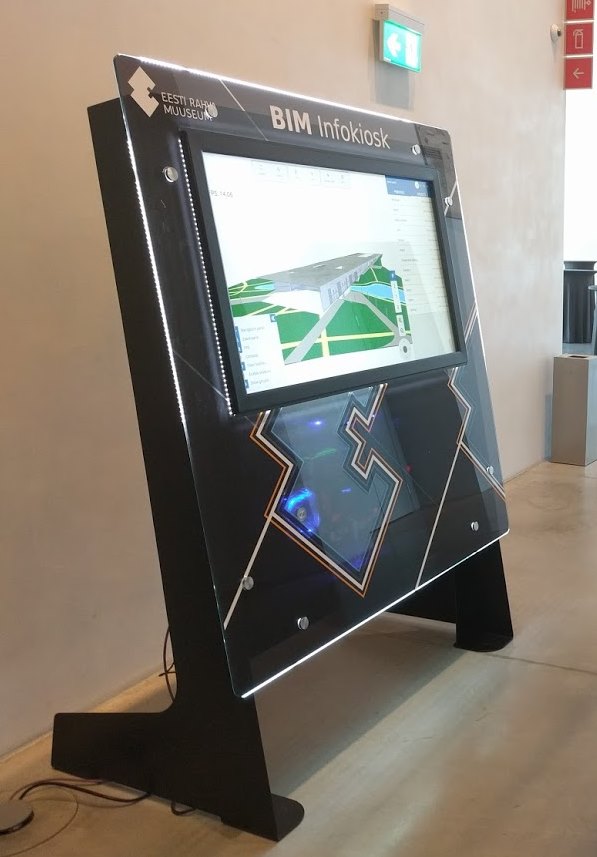
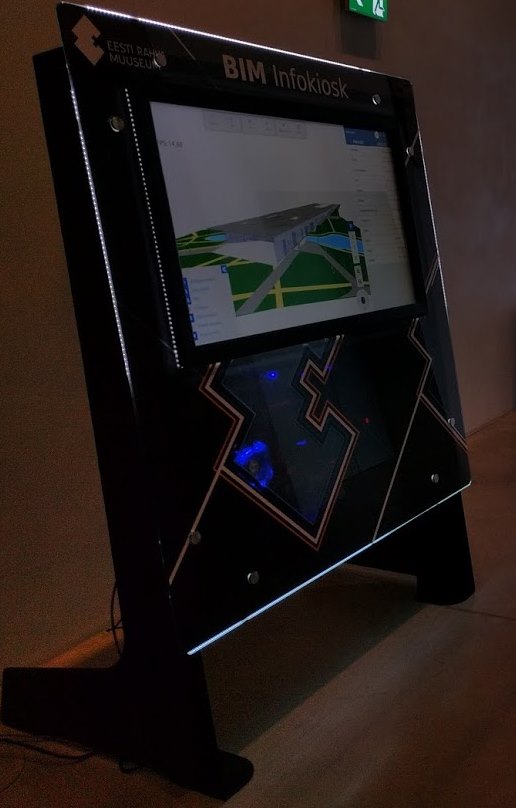
We have developed an interactive kiosk for 3D applications. The kiosk is equipped with a landscape LCD screen, a touch panel and a dedicated graphics card which makes it suitable for applications that require greater graphical computing capabilities.

Most of the modern kiosk hardware is made as thin as possible and in most cases kiosk hardware use small PC-s like Intel NUC’s or even USB stick like Intel Compute Sticks. This is enough for showing advertisements or 2D wayfinding plans, but for larger 3D applications these PCs tend to be too weak. For one of our latest projects we had a challenge to create a special kiosk, where we could put a regular size motherboard and graphics card. The outcome is quite impressive and we are definitely taking this 3D kiosk further so we can provide it to other customers also. It can be counted as first Gamers’ kiosk PC in the world.

kiosk_for_3D_applications

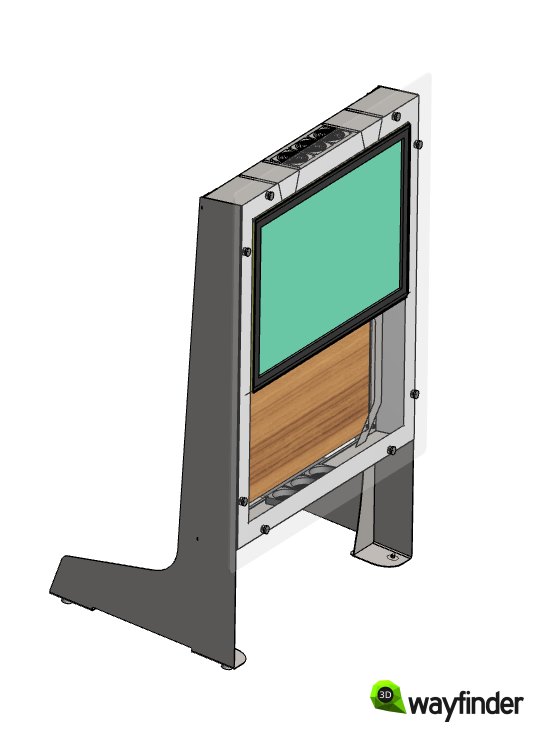
The kiosk is built on a metal frame, that supports the 8 mm tempered glass and holds the touch screen and computer hardware. The metal frame has enough weight and the screen is leaning back in a light angle. So it stays firmly on the ground and so there is no need to mount it to the floor.

3D_kiosk_metal_frame_supporting_LCD_touch-screen

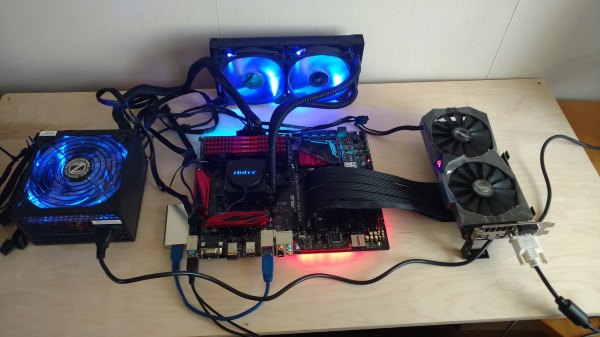
For the computer we used regular PC components. The idea was to make the inside visible through the glass, so we put the emphasis on the looks of the components. We used components that had LED-lights so it would make a impressive light show. To place graphics cards separately, PCI Express riser cable was used. Common riser cables are white/grey color, but we needed the black one, so it would also look nice.

3D_kiosk_PC_with_GPU

In current kiosk we used ASUS B150 Pro Gaming motherboard with Intel Core i5-7400 CPU cooling with Antec Kühler H2O H1200 watercooling. Power supply is 700W Zalman 700TX. Graphics card is ASUS GeForce GTX 1050 Ti, but it was planned to upgrade GPU when needed.
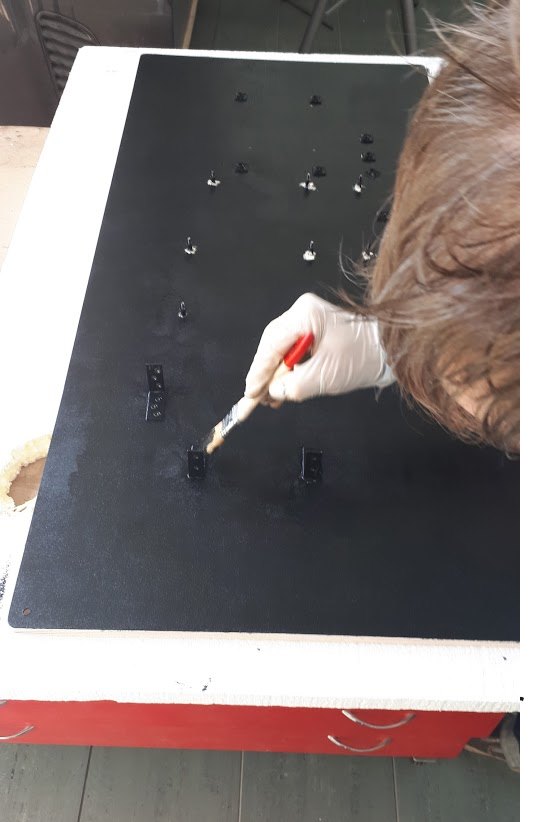
After aligning all the components and making the cabling in proper way, we painted the plate black. It is important to fix and align all the cables, otherwise it wouldn’t look nice. Especially as the PC plate will be partly visible through the covering glass of the kiosk.

3D_kiosk_PC_plate_painted_black

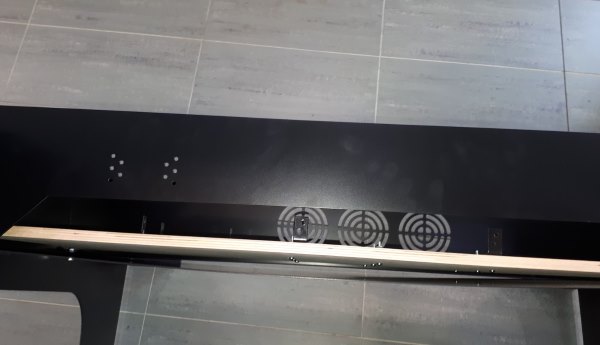
Kiosk has 3 vents for blowing the air out from the bottom of the frame. On top of the kiosk we have also 3 vent openings, that are being used for air intake. It is possible to use there alsovents, but in current installation we just put there dust filter.

3D_kiosk_ventilation_holes_in_frame

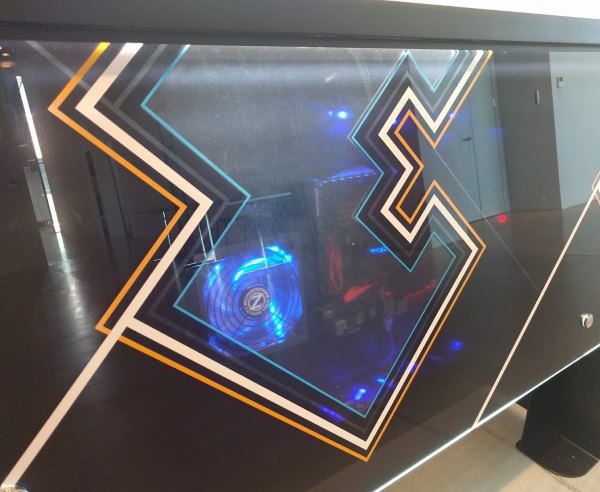
Glass has been mounted to metal frame by special glass mountings. It is possible to paint the glass from both sides to make kind of 3D effect. In current case we used customer’s corporate design elements, which were lines. The background is dark gray, but not in full color, so it is possible to see through it. Also it has a special “window” for looking at kiosk heart – the PC built on wooden plate.

3D_kiosk_PC_GPU_LED_lights

On the inner side of the glass we have installed LED bar, so the edge of the glass is shining. The light also reflects the printed pattern on the back. In our case we used gray, so the effects are not that visible.

3D_kiosk_with_glass_LED_lights

The kiosk was created for special building information (BIM) application in Estonian National Museum. There are over 10 thousand elements in this 3D model. This has been so far the largest 3D model used in 3D Wayfinder. When on high end laptop the application is running on around 5 FPS, then in this kiosk it is more than 15 FPS. More detailed overview of the BIM application is coming soon.

Glass was created by Glasstech and kiosk frame was designed and manufactured by Hecada.

« »

New Features in 3D Wayfinder

January 15, 2016

With the end of 2015 and the beginning of this year there are many new features added to 3D Wayfinder. The goal of these changes was to add flexibility to customizing the behavior of the 3D map and wayfinding. Custom models for path, path types, POI options and many more.

In parallel with large customer projects, we have added many new features to 3D Wayfinder. Most of them were requested by our customers and we have added them as features/settings for all our users. Below are listed the most important ones.

Custom models for path visualizationcustom_path_models_wayfinding
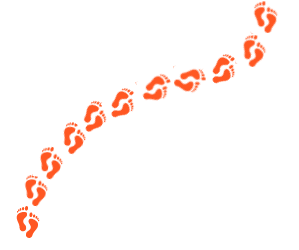
It is now possible to choose your own custom models for path visualization. Path models can be different kind of arrows, footprints or simple tubes/lines. Changing path visualization models can be done under settings.

In near future we’ll add some sample path models also to our blog.

Path types and accessibility paths

It is now possible to add different kind of inaccessibility attributes to the path . This can be used for defining paths  that are also accessible with wheelchairs and/or baby strollers. This also enables defining other kinds of areas, like paths for service personnel etc.

Currently it has to be entered to the node attributes in json object format:

{

“inaccessibility”: [

 “wheelchair”

]

}

wheelchair_wayfinding_inaccessibility_Path_types_and_accessibility_paths

The nodes with these kind of restrictions cannot be used for path finding with “wheelchair” option. It is useful to set these restrictions for stairs or doors.

To use the inaccessibility in user interface, you have to change the accessibility option first:

this.wayfinder.accessibility = “wheelchair”;

Then it is possible to use the same show path method:

this.wayfinder.showPath(poi.node, poi);

And after showing path, just change the accessibility option back to blank:

this.wayfinder.accessibility = “”;

Also check out our blog post about how to set up time dependent navigation rules.

POI specific options

Advanced_POI_settings_specific_options

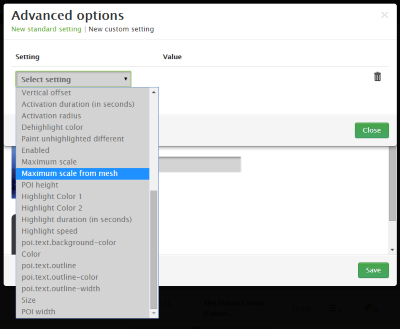
It is now possible to create special settings for each POI (location). These settings can be chosen from the list of all POI settings, like the size of the billboard image or billboard text size, highlight color, activation radius, billboard height etc.

This feature allows to customize the map by locations, for examples larger shops can have larger texts or text colors can be set by each shop. Also it makes easier to use logos or icons on the map, as the billboard images don’t have to be the same size anymore.

In the future it is possible to add new settings that can be used when developing your own template.

Top-down view for Path showing

path-top-down-view-for-path-showing

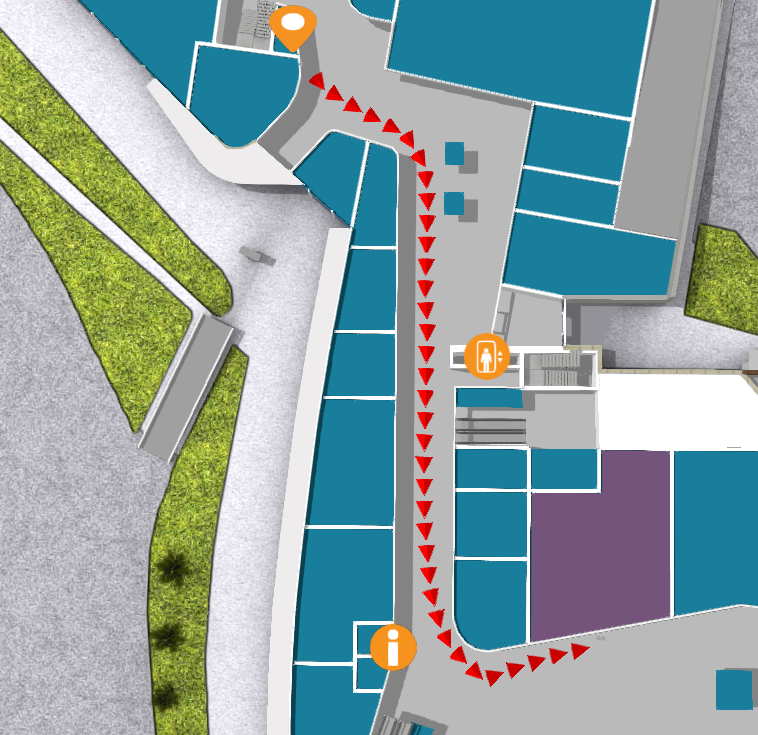
Now there is a simple option under settings to turn the map to top-down view when showing the path.

In general it is not a good idea to show the “You are here” location from top-down view, but rather  from certain angle (especially when it is possible with real 3D models as in 3D Wayfinder), which provides a better overview of the map and also makes the map look better.

Now when using the same angle, as displaying the “You are here” location, and visualizing the path, it may happen that the visualized path might not be visible. This is due to tall objects like walls that might block the view of the path. Using the top-down view during path visualization solves this problem.

Pause options between changing floors

According to valuable customer feedback, the transition of switching floors happens too quickly , which might be a bit confusing for the end-users. We solved this issue by adding the “pause-time” option to the settings. With this option it is possible to adjust the duration of the pause before switching to the next floor. The pause duration can be defined in seconds,  which makes it easiest to find  the proper delay that helps  all wayfinder users to understand, which floor they have to go to.

Kiosk view enhancements

In addition to being able to save the view angle, it is now possible to save the zoom factor for “kiosk view”. By clicking the “You are here” button, the map assumes the “kiosk view” saved in the editor.

In the future we will add this view option as a separate object so the view can be linked with any location or node.
« »