On Screen Keyboard Open Sourced

January 25, 2019

3D Wayfinder uses a in-house built JavaScript Keyboard for search input. A On Screen Keyboard (Keyboard later on) is used when there is no physical keyboard. For security and ease of use reasons we can’t use the Operating Systems builtin Keyboard.

3D Wayfinder in-house built JavaScript Keyboard for search input on screen.
Norwegian keyboard

Previously we used our own User Interface library to manage the state of our applications. But times have moved on and we are now using other more popular and powerful open source libraries like AngularJS and VueJS. We managed to use the old Keyboard also with these libraries. But it wasn’t very handy and meant that we had to import libraries that were not necessary for whole project (eg jQuery).

So we decided to get free of 3rd party libraries and make it easy to install via npm (nodejs package manager).

Our On Screen Keyboard is usable with any UI library that supports importing ES6 module formats. You can define Your own keyboard layouts and actions with a JSON layout file. So we can have any language that we ever need and also make also fully custom keyboards that only a number pad or have special buttons for custom actions. Also the Keyboard itself allows to switch the layout.

Check out the GitHub page.

« »

First Person View Makes Wayfinding More Real

October 20, 2018

We have had first person view as a camera option for a while, but it hasn’t been very flexible. We have now fixed the issues and added new settings to make the camera run smoothly and at desired height.

First person view camera can be used with 3D models and it imitates persons point of view. You can change the height of view to your preference, adjust camera speed, the time how long the camera will stay at the end point and if you wish to see the path or not. First person view settings can be found under camera settings in our administration panel.

3D Wayfinder first person view

It is a perfect way to let people get the real feel of the room and that way it is making wayfinding easier. 

For example, if you have a house in building stage for sale and you want to give your client a chance to take a walk in it, then first person view is definitely the best way to do it.

Another good option is using first person view outdoors. Places like parks and ski resorts might not be that easy to navigate because of the general similarity of objects. First person view can help you to remember the details and navigate your way using details and some specific objects.

You don’t need to render a video, the project can easily be shared by link online and customers can choose by themselves how they want to explore.

Our biggest advantage is, that all the updates to the paths and model are also done online and real time. This means that changes are fast to make and mistakes are easy to correct without the need to render everything again.

« »

Adding Videos is Easier Now

May 2, 2018

We added functionality to set a frame duration automatically based on the length of video in kiosk that was added to the frame.

Adding a frame duration was done manually before, it caused problems like cutting a video short or starting replaying a video. Now when you upload the video and choose it from the gallery, the frame will already show the video length. It only works for newly uploaded videos.

old admin ad frame

Since advertisement module has not been added to our new admin yet, it was added to our old administration panel for now.

« »

Using Widgets in Wayfinding Application

April 13, 2018

Wayfinding applications are not just maps with “You Are Here” dot anymore. There are many possible functionalities and widgets that our customers prefer to see on their wayfinding applications. 3D Wayfinders HTML-based user interface makes it really easy to add and use such widgets in wayfinding application.

As wayfinding kiosks are usually in visible places. Visitors would also like to find other kind of information than the building map and directory listing. Large shopping malls are usually accessible via intercity bus or metro stations. It is important to find the commuting schedules. Also in larger modern shopping malls. There are integrated cinemas, which would also like to show their programme.

Nowadays people have smartphones, that can show weather forecast and date beside the clock. But still one of the things our customers are asking for quite often. This is a clock integrated to the wayfinding application.

wayfinder widgets

We have created a NPM package ‘ng.clock’ for the widget. It can be found at https://www.npmjs.com/package/ng.clock. Demo of the clocks can be found here https://codepen.io/tonister/pen/qpyBgQ. This clock widget is made as an AngularJS 1.x Directive. The choice to use AngularJS is due to the fact that almost all our latest templates have been created using AngularJS.

3D Wayfinder user interface is created with HTML. It is easy to implement any widget or integrate bus or cinema schedules inside wayfinding application user interface. Although it might be good to mention that for some of these features the API licenses are not free. If they are free then they are very limited.

Thanks to HTML5 based layouts it is easy to integrate different kind of widgets in wayfinding application. For example exchange rates, events, news, weather forecasts, social media feeds, CAP alerts, time remaining till closing.

« »

Our Kiosk Will Take Part of Centenary Celerbration

February 23, 2018

Estonia celebrates its 100th birthday this weekend. Estonian National Museum, where we have provided the BIM kiosk, is playing a big part in it.

Kiosk

President Kersti Kaljulaid’s official reception will be held in the Estonian National Museum on 24th of February. This means that some of the most distinguished people of the country will be visiting and our kiosk has also received a little makeover to celebrate the occasion.

« »

International Colleges Benefit Most From Wayfinding Solutions

February 13, 2018

Large school campuses are usually difficult to navigate for new students and visitors. We installed wayfinding  kiosks for Baltic Defence College which is international college with complicated buildings, facing the same “hard to find” problem. 

Baltic Defence College is located in a big old two-winged building with two modern extension buildings. It is an international school, which means that lots of foreign students, lecturers and visitors need to find their way to lecture halls and cabinets on time.

As if an old building with labyrinth-like corridors isn’t enough. The new part is connected to it with only one glass corridor. So going from the ground floor of the old building to a classroom on the fourth floor of a new building is quite a challenge for a newcomer.

IMG_20180212_104055

Most of the university campuses tend to have the same problem. There are many buildings with hundreds of rooms. Even though class schedule is no longer printed out to put up on bulletin boards. Wayfinding is still left on outdated tools – if there’s any wayfinding solution at all.

Interactive wayfinding kiosks are the best answer for college wayfinding solution, in places like this. Of course they cost more than a printed map. But they are also much more useful, practical and can be used for multiple purposes.

In addition to showing directions you could use the screens for announcements, room change notifications, class schedules, bus time tables, events advertising and so much more. Kiosks could also be replaced by a mobile app and iBeacons for indoor positioning.

« »

New Improvements for 2D Floor Plans

January 30, 2018

We have added a couple of improvements for 2D floor plans, that make uploading 2D floor plan images easier. We are also working on couple of new features. That will make using 2D maps much easier.

3D and 2D maps share the same data in 3D Wayfinder. This is for using 3D and 2D side by side.

As 2D maps will be shown in 3D Wayfinder editor as textures on a plain. There are couple of requirements that have to be filled, like texture shape and size.

2D floor plans

Now we have added automatic texture resizing. So 2D map images don’t need to be square-shaped anymore. The longest side should still be at least 1024 pixels, if its less, the map will be resized to this value.

We will also resize the map to the closest larger power of two when none of the sides is 1024, 2048 or 4096 pixels. The ratio between the sides will stay the same so the map image will not be distorted after resizing.

We require the longest side to be 1024 pixels. But if you want to have a large and good quality map, then uploading an image with 4096 pixel side is a way to go.

Shopping center 2D floor map.

2D floor plans are a good start for wayfinding solution since they often already exist, so no extra effort goes into creating a map.

Right now our system allows uploading only raster files like PNG or JPG. Soon we will add new feature which enables uploading vector files like SVG. This means that maps could be zoomed in as much as needed and areas can be made clickable automatically.

We are also working towards the goal that 2D and 3D maps wouldn’t need separate templates anymore. It can be specified in the settings if you want to use the map as 2D or 3D.

This means that in the future it will also be possible to use both maps at the same time. 2D in mobile and 3D in kiosks.

« »

Wayfinding Kiosks are Part of Renovating a Mall

January 4, 2018

Harbour placed shopping mall Nautica has got a new name and a new look. After rebuilding the shopping mall, two wayfinding kiosks were also placed. Although the mall is not large, the wayfinding feature is really important for them.

Nautica-kaubanduskeskus

Nautica mall in Tallinn, Estonia reopened in the end of 2017. It has only about 60 shops but wayfinding kiosks are more important than ever after the renovations. Old shops are in new places, new shops have been advertised but neither the old or new clients know where to find them.

In Nautica things are made even more difficult. Because a new floor was added and most of the restaurants, ATM-s and bathrooms are placed there.

Kiosks in Nautica are simple and practical. They don’t take a lots of room and their slanted design indicates immediately that the screen. Even though it might have an advertisement as a screensaver – is meant for customers to use.

nautica_wf_kiosk

Kiosks are conveniently placed by the doors of the two main entrances. These are the first things that every customer sees when they enter. Placement like this makes it easy for visitors to notice. They don’t need to start looking for maps or signs when they are not sure where they should go.

It is also practical because it’s more likely for the visitor to take notice of the kiosk right after entering than in the middle of the busy mall. So when they need to use it later, it’s easier for them to remember where to find it.

nautica_kiosk

The design for the new template was provided by the mall. We only needed to bring it into reality. They wanted a stylish and simple look with clear and easy to use interface. They also wanted to have all the shop names displayed on default screensaver, slowly rolling by on the screen. This animation with shop logos also works on map view. If the customer hasn’t touched the screen for a little while.

« »

New Top View Feature in Our Editor

January 2, 2018

Sometimes it’s the small things that make all the difference. New “Toggle top view” feature in 3D Wayfinders administration panels editor is a useful tool that will give needed help to our users.

Toggle top view shows all the maps straight from the top and it works with both 2D and 3D maps. While this feature is selected, the rotation is disabled. This is most useful when marking paths on the map. It could also be used if you want to set kiosk view straight from the top on 3D maps.

New feature in editor

“Toggle top view” can be found on the top of the editor under “Settings“.

« »

Installing iBeacons is Easy

November 14, 2017

We have finished installation of approximately 250 iBeacons for mobile app positioning. Although the installation process is easy. There are some tricks and common practises to follow, when setting up iBeacon based indoor positioning.

iBeacons installation

iBeacons are cost effective indoor positioning devices, that are really easy to install. As each iBeacon has it’s own battery, that can last about a year, then there is no need for external power supply. Devices are very light, so it is possible to mount them by using double-sided tape.

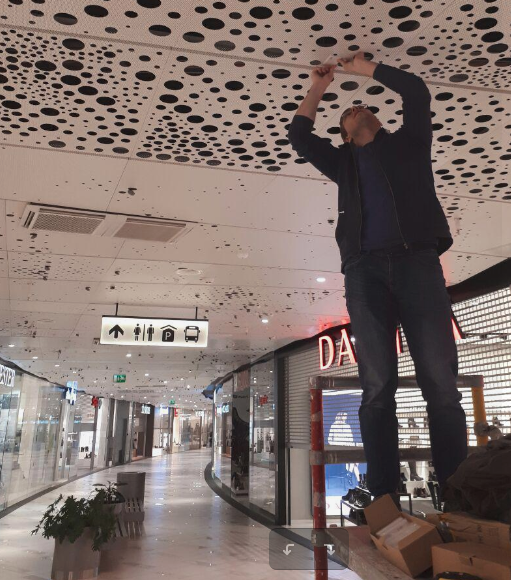
Even though the installation of one iBeacon is a simple matter. Overall installation process can be quite long and somewhat physically exhausting due to the constant climbing up and down the ladder/platform.

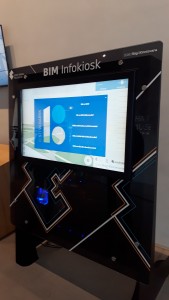
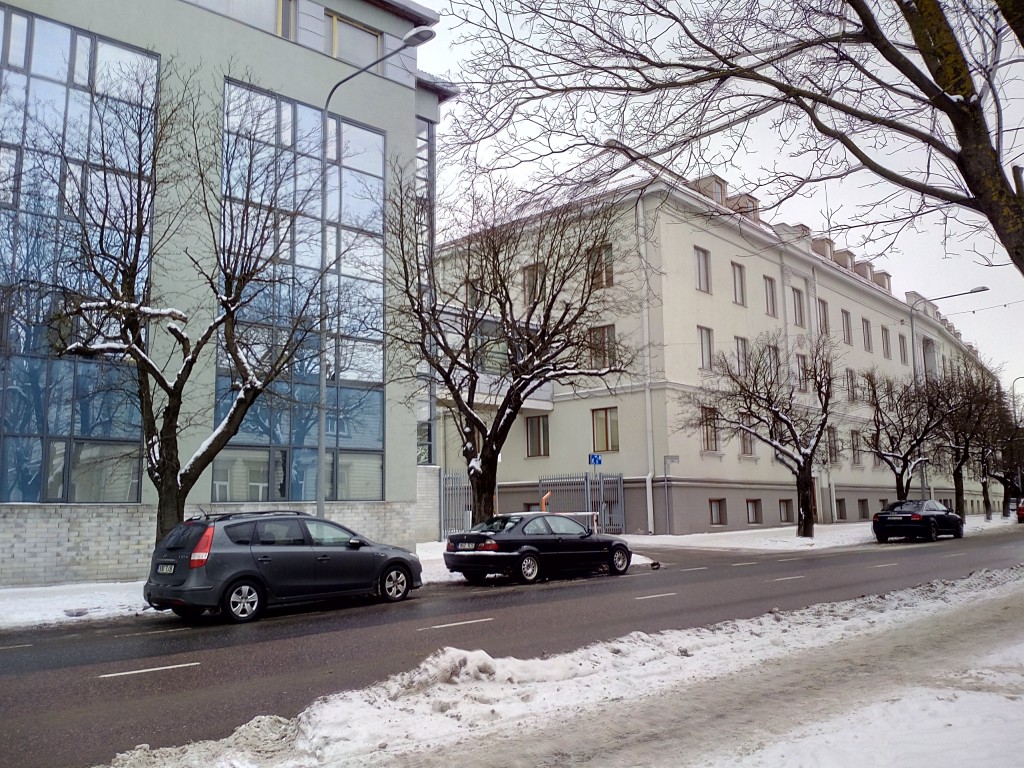
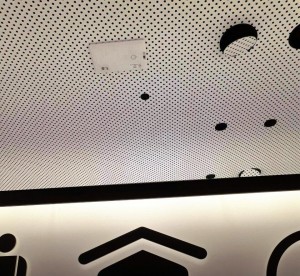
At first glance it might seem that the device will disrupt the look of the building. But, as we can see from the image below, if you take into consideration the overall theme and look of the building during choosing of the device, it merges into the plethora of different sensors and equipment covering the ceiling.

Installing iBeacons

Before installing devices. It is important to mark down the specifications for each iBeacon device. Each iBeacon has it’s parameters: unique ID, name and range.

It is also a good practice to mark the iBeacons. So that you know you’re installing the correct device to the correct location. For this we used a label printer.

iBeacon

Plan before iBeacons installing

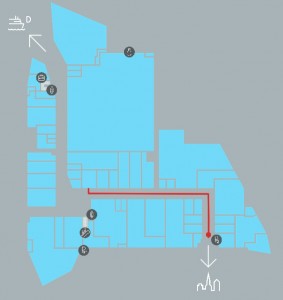
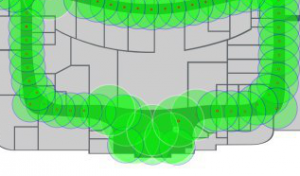
It is good to have a plan before physical installation. We used the map of the building to first draw a layout of the placement of the devices and their coverage area. It is a common practice to have a minimum of 3 iBeacons covering any part of the mappable area for the navigation to work efficiently.

iBeacon coverage map

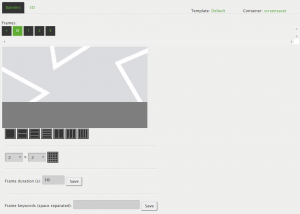
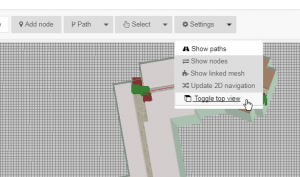
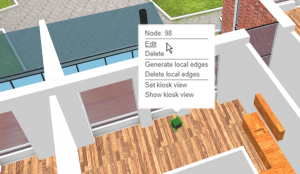
Configuring iBeacons in 3D Wayfinder is also easy. Just create a node with type “iBeacon” and enter iBeacon parameters (UUID, Name etc.). To manage all the devices from one place, open “Beacons” from the left-side menu. You can do this prior to the actual installation when you are confident that your layout will work.

iBeacon management

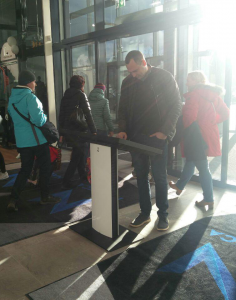
It is highly recommended to install the iBeacons to a height unreachable for the visitors of the building, so no one could easily snatch them. We installed the devices onto the ceiling. For this we used a painters platform that had wheels on them so it is easy to move it around the building. We recommend setting the platform to a height so the person installing the devices could stand up straight and then reach the ceiling without having to stretch too much.

Good time to install iBeacons in a shopping mall is when there are not that many people.

Here you can find more information about using iBeacons with 3D Wayfinder. If you’d like to test iBeacon-based positioning, please submit the request form for demo iBeacons.

« »