New map formats for 3D and 2D floorplans

August 24, 2023

3D Wayfinder supports now GLTF for 3D floorplans and SVG for 2D floorplans. This provides new features and better-looking maps.

Now there is a support for new 3D model format GLTF for 3D maps and also integrated support for SVG (vector-based images) for 2D maps. GLTF enables smaller files size and new possibilities to make 3D maps better-looking. SVG at the same time makes 2D map creation easier, as SVG is vector-based format. This allows to upload maps with mark ceilings or areas (by SVG polygons). Therefore with our wayfinding software these ceilings can be link with locations and they can be clickable and highlighted.

We will write about SVG benefits in new post also we will provide short tutorials, how to use SVG in 3D Wayfinder. Here we will cover GLTF as this opens up a whole new world for 3D maps.

In the dynamic world of web development, technology is constantly evolving to create richer and more immersive experiences for users. One such innovation that has been making waves is the GLTF (Graphics Library Transmission Format) format for 3D. GLTF is changing the game by enabling efficient and seamless integration of 3D graphics into web applications, paving the way for a new era of interactive and visually stunning online content. Now we have also GLTF support in 3D Wayfinder.

GLTF format in 3D Wayfinder

GLTF stands for Graphics Library Transmission Format. GLTF is an open standard file format design to store and exchange 3D scenes and models with the purpose to optimize transmission and rendering across different platforms and devices. The format is Develop by the Khronos Group (same consortium behind widely use standards like OpenGL and Vulkan). The goal of GLT is to remove limitations of existing 3D file formats and enabling efficient delivery of 3D content on the web.

Advantages of GLTF

  • Compact File Size: GLTF employs efficient compression techniques to minimize file sizes without compromising on visual quality. This is crucial for web applications, as smaller files ensure faster load times and smoother user experiences. With 3D Wayfinder, it will make loading 3D maps faster. Also, there is no need for converting 3D models, when uploading maps to 3D Wayfinder.
  • Ease of Integration: GLTF files are specifically designed to work seamlessly with modern web technologies like WebGL, making it easier for developers to integrate 3D content into their websites without extensive workarounds or plugins.
  • Support for PBR: Physically Based Rendering (PBR) is a technique that simulates how light interacts with surfaces in the real world. GLTF supports PBR, allowing for highly realistic and visually captivating 3D graphics.
  • Animations and Interactivity: GLTF supports animations and allows developers to define interactive elements within the 3D scene. This capability opens the door to creating engaging interactive experiences that go beyond static visuals.

Please stay tuned, as we will write more about SVG support also in near future.

« »

Keeping Floor Plan Editor Idle in the Background

August 1, 2017

The new 3D Wayfinder Administration Panel is centered more around the floor plan editor. To provide better usability we keep the 3D editor idle when moving away to other pages. So switching between editor and other views is much faster now.

The new Administration Panel has been publicly available for testing since the beginning of this year. At the end of the summer we will only support the new administration panel. Although the current administration environment will be available for some time.

Loading the 3D floor plan editor takes a couple of seconds because we need to load 3D floor-plans models and also additional editor tools. Now when the editor is always in the background. We do not need to load the 3D editor again. This makes the usage more faster and user friendly.

new 3D floorplan editor

Our new administrator panel is being built on Angularjs. To achieve loading of editor once we have created the service that holds the canvas element. It is also attached our editor API to it. Controller then adds canvas to the editor view and provides connection to API actions.

To see and test new Administration panel and floor plan editor, please log in here. If you don’t have an account with 3D Wayfinder, you can create it here for free.

« »

Showing Multiple Floors in Path Animation

March 20, 2017

New feature we have added for wayfinding applications is accordion style floors when using path animation. This means, that all floors will be visible on the screens when showing the path through multiple floors.

In 3D Wayfinder you will see all floors as they exist in real building, so they are just simplified 3D models of the real floor-plans. When switching between floors, new floors will drop into scene on top of the previous floors or fly away, if going downward with the path. All floors are exactly covering previous ones, so basically whole 3D building models are sliced by floors.

Now it is possible to keep the floor plans apart from each other, so you can see all floors at the same time. This is useful mainly for wayfinding, so it is easy to remember the whole route. But we will definitely develop this “accordion” mode further, so it can be used also in other applications. For example in BIM applications, it is possible to highlight objects in all floors at the same time. Or visualize the whole factory with multiple floors or create multi-layer metro station animations.

Animation_floor_animation_in_3D_wayfinder_optimize

Currently the distance between floors is configured under settings. In future we will add features for separating the floors by dragging the floor-buttons apart. This makes the browsing of 3D buildings much more flexible.

To use this accordion style path animation, go to Settings in Administration panel. Then find Path->3D->Leave a offset between floors. For example use 50 as an offset, and then see how it looks.

« »

Portals in Wayfinding Software

May 25, 2016

We have implemented new type of nodes – portals. This makes it possible to guide visitors instantly from one point to another.

Portals in wayfinding software can be used for creating an instant path between a large number of floors or when floors are drawn on the same map as shown in the image below.

Portals_in_wayfinding_software

In the case where a building has a large number of floors the portal nodes become exceptionally useful they allow the path to “jump” instantly from one floor to another making the path visualization instant.
The portal nodes are useful in the case where there is a greater distance between locations where you don’t need to show the way. For example in the case when using a train or a tunnel in between locations.

The nodes operate the same way as in the popular videogame Portal. The main idea is that you can create two gateways in between which the path can move freely either way.

Currently the portal nodes only operate on 2D maps, but at the moment we are working on developing portal nodes for 3D maps. They will be available soon to make your wayfinding solutions even more flexible.

« »

3D Interactive Floor Plan Demo

September 8, 2015

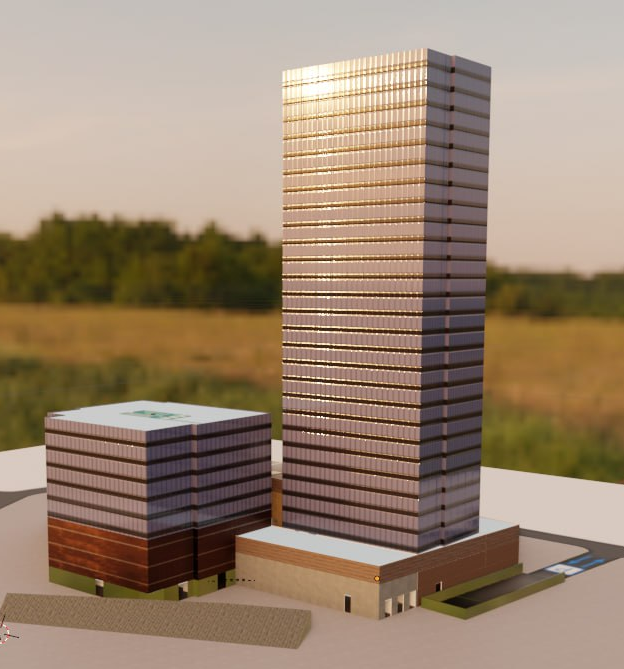
Check out our new 3D Wayfinder platform demo. This will give you short overview of what you can do with 3D Wayfinder and what are our API capabilities.

The demo has following topics:

  1. Moving 3D map with mouse cursor or touch screen.
  2. Clicking on the map and getting location name and description.
  3. Changing floors of the building.
  4. Showing path between 2 locations.

Demo is accessible from the 3D wayfinder home page and can be opened also from this link:

[xyz-ihs snippet=”3D-demo”]

Demo is based on following javascript code. You are welcome to use it in your projects, your HTML should contain canvas with ID “map”. For more info please see 3D Wayfinder embedding tutorial.

var wayfinder;
var map;
var mapContainer;
var poiInfo;
var tutorialArea;
var currentStep = 0;
var STEPCOUNT = 3;
var originals = {};
var floors = {};

function mapResize(){
	if(wayfinder){
		cont = mapContainer.find(".map-area");
		map.attr("width", cont.css("width"));
		map.attr("height", cont.css("height"));
		wayfinder.resize();
	}
}

function runDemo(){
	map = $('#map');
	poiInfo = mapContainer.find("#poiInfo");
	tutorialArea = mapContainer.find(".tutorial-box");
	wayfinder = new Wayfinder3D();
	wayfinder.options.assetsLocation = '//static.3dwayfinder.com/shared/';
	wayfinder.open("1a07bdc53edb3828f390bc9af7281585");
	setTimeout(mapResize, 150);

	wayfinder.cbOnProgress = function(percentage){
		$("#progression").css('width', percentage * 100+'%');
	};

	wayfinder.cbOnDataLoaded = function(){
	    mapContainer.find(".loading-screen").hide(100);
	};

	wayfinder.cbOnMapReady = function(){
		removeAllFunctionality();
		setText(0);
		stepTutorialButtons(0);
	};
}

function stepTutorialButtons(step) {
	var prev = tutorialArea.find(".tutorial-prev");
	var next = tutorialArea.find(".tutorial-next");

	if (prev.text() && step === 0)
		prev.text("").off("click").css("cursor", "auto");
	else if (!(prev.text()) && step !== 0)
		prev.text("<").click(previousStep).css("cursor", "pointer");

	if (next.text() && step === STEPCOUNT)
		next.text("").off("click").css("cursor", "auto");
	else if (!(next.text()) && step !== STEPCOUNT)
		next.text(">").click(nextStep).css("cursor", "pointer");
}

function removeAllFunctionality() {
	if (wayfinder) {
		if (wayfinder.poiController) {
			originals.onPOIClick = wayfinder.poiController.onPOIClick;
			wayfinder.poiController.onPOIClick = function(poi, position, event) {};
		}
		originals.cbOnPOIClick = wayfinder.cbOnPOIClick;
		wayfinder.cbOnPOIClick = function(poi) {};
	}
}

function setText(step) {
	var keep = tutorialArea.find(".tutorial-text").find(".keep");
	if (keep.length)
		keep = keep.detach();
	switch (step) {
		case 0:
			tutorialArea.find(".tutorial-text").text("Click and drag on the map to move or rotate.");
			break;

		case 1:
			tutorialArea.find(".tutorial-text").text("Click on a location for more info.");
			break;

		case 2:
			tutorialArea.find(".tutorial-text").text("Click on a button to show that floor.");
			break;

		case 3:
			tutorialArea.find(".tutorial-text").text("Click on the button to show the path between two random locations.");
			break;

		default:
			break;
	}
	if (keep.length)
		tutorialArea.find(".tutorial-text").append(keep);
	stepTutorialButtons(step);
}

function addFunctionality(step) {
	switch (step) {
		case 1:
			if (wayfinder && wayfinder.poiController) {
				wayfinder.poiController.onPOIClick = originals.onPOIClick;
				wayfinder.cbOnPOIClick = function(poi) {
					poiInfo.show(100);
					poiInfo.find(".title").text(poi.getName("en"));
					var poiDescription = poi.getDescription("en");
					if (poiDescription)
						poiInfo.find(".description").text(poi.getDescription("en"));
					else
						poiInfo.find(".description").text("");
				};
			}
			break;

		case 2:
			poiInfo.hide(100);
			poiInfo.find(".title").text("");
			poiInfo.find(".description").text("");

			if (wayfinder) {
				var showFloor = function() {
					var f = $(this).attr("data-floor");
					if (f in floors)
						wayfinder.showFloor(floors[f]);
				};
				var fs = wayfinder.building.getFloors();
				tutorialArea.find(".tutorial-text").html("<div class='keep'></div>");
				var floorsMenu = tutorialArea.find(".tutorial-text").find(".keep");
				for (var i in fs) {
					if (fs[i] && fs[i].showInMenu) {
						floors[i] = fs[i];
						var button = $("<button data-floor='"+i+"'>"+fs[i].getName("en")+"</button>").click(showFloor);
						floorsMenu.append(button);
					}
				}
			}
			break;

		case 3:
			if (wayfinder && wayfinder.logic) {
				var randomPath = function(times) {
					if (typeof times !== 'number')
						times = 1;
					if (times > 9)
						return;
					var poiList = wayfinder.pois;
					var poiIDs = [];
					for (var i in poiList) {
						poiIDs.push(i);
					}
					var rand1, rand2;
					while (!rand1 || !(poiList[rand1].getNode())) {
						rand1 = rand2 = poiIDs[Math.floor(Math.random() * poiIDs.length)];
					}
					while (rand2 == rand1 || !(poiList[rand2].getNode())) {
						rand2 = poiIDs[Math.floor(Math.random() * poiIDs.length)];
					}
					rand1 = poiList[rand1].getNode();
					rand2 = poiList[rand2].getNode();
					try {
						wayfinder.logic.showPath(rand1.id, rand2.id);
					}
					catch (e) {
						// Try again
						randomPath(times + 1);
					}
				};
				tutorialArea.find(".tutorial-text").html("<div class='keep'></div>");
				var area = tutorialArea.find(".tutorial-text").find(".keep");
				var pathButton = $("<button>Show random path</button>").click(randomPath);
				area.append(pathButton);
			}
			break;

		default:
			break;
	}
}

function removeFunctionality(step) {
	switch (step) {
		case 1:
			if (wayfinder && wayfinder.poiController) {
				wayfinder.poiController.clearHighlights();
				poiInfo.hide(100);
				poiInfo.find(".title").text("");
				poiInfo.find(".description").text("");
				wayfinder.poiController.onPOIClick = function(poi, position, event) {};
				wayfinder.cbOnPOIClick = function(poi) {};
			}
			break;

		case 2:
			tutorialArea.find(".tutorial-text").find(".keep").remove();
			break;

		case 3:
			addFunctionality(2);
			break;

		default:
			break;
	}
}

function previousStep() {
	if (currentStep === 0)
		return;
	removeFunctionality(currentStep);
	currentStep--;
	setText(currentStep);
}

function nextStep() {
	if (currentStep === STEPCOUNT)
		return;
	currentStep++;
	addFunctionality(currentStep);
	setText(currentStep);
}

$(function(){
	mapContainer = $("#demoMap");
	$(".home-video").click(function () {
		mapContainer.show(100);

		if(!wayfinder)
			runDemo();
		else
			wayfinder.engine.run();

		$(window).resize(mapResize);
	});
});

« »

Preview of Inserting External 3D Models to Floor Plans

June 17, 2015

Currently we are developing features to insert external 3D models to floor plans. With this it would be possible to add these “little details” (like escalators, benches, trees or even cars). That make the floor-plans look realistic. The best thing is, that it doesn’t require any 3D modelling skills. So all our users can detail the floor plans by themselves.

3D object library can be opened in Editor window with object thumbnails:

3D_wayfinder_add_3D_models_from_library_to_add_3D_models_to_floor_plans

Added objects appear on the 3D scene. The good part here is, that the same model can be used inside the scene many times. Therefore it doesn’t increase the downloadable model sizes as each model will be loaded only once.

3D_wayfinder_add_3D_models_to_scene

3D models to floor plans can be resized and moved inside the 3D Wayfinder.

3D_wayfinder_add_3D_models_rotate

With external 3D models. We will definitely provide common library of models we are using to detail the floor plans. For example these will include trees, cars, different indoor plants, escalators, tables, stairs and so on. See our user manual.

« »