Latest Updates on Our CMS

August 27, 2019

For the past few months we have been working on making content management system better and more user-friendly. There is a constant work on fixing bugs and but with this blog post we are ready to introduce you a few updates that make using our CMS easier.

1. Adding a new POI directly from editor.

Before it was necessary to add every POI under “Locations” section but with our latest update it is possible to do it directly in the map editor. Just choose the desired POI, click on “Edit” and from section opening on the right just click “Create new”. Simple as that!

Entering a new location directly in map editor

2. Hiding/showing mesh

With some models it used to be quite a time-consuming work to get the nodes in their right positions. Sometimes node appeared on the mesh and therefore it was needed to move them downwards manually. With our latest updates it makes removing mesh easy and fast. Just select the mesh you would like hide and click on “Hide mesh”. No more manual work!

With our latest updates it makes removing mesh easy and fast. There is a constant work on fixing bugs and we are ready to introduce you a few updates that make using our content management system CMS easier.

3. Connecting nodes on different floors

It used to be complicated to connect nodes on different floors due to different possibilities of stairs, escalators, elevators etc. Luckily we have removed that problem and added a pop-up box when the user tries to take the path from one floor to another.

There will be some more updates coming soon! We will let you know more on that in our next blog post.

« »

Using Widgets in Wayfinding Application

April 13, 2018

Wayfinding applications are not just maps with “You Are Here” dot anymore. There are many possible functionalities and widgets that our customers prefer to see on their wayfinding applications. 3D Wayfinders HTML-based user interface makes it really easy to add and use such widgets in wayfinding application.

As wayfinding kiosks are usually in visible places. Visitors would also like to find other kind of information than the building map and directory listing. Large shopping malls are usually accessible via intercity bus or metro stations. It is important to find the commuting schedules. Also in larger modern shopping malls. There are integrated cinemas, which would also like to show their programme.

Nowadays people have smartphones, that can show weather forecast and date beside the clock. But still one of the things our customers are asking for quite often. This is a clock integrated to the wayfinding application.

wayfinder widgets

We have created a NPM package ‘ng.clock’ for the widget. It can be found at https://www.npmjs.com/package/ng.clock. Demo of the clocks can be found here https://codepen.io/tonister/pen/qpyBgQ. This clock widget is made as an AngularJS 1.x Directive. The choice to use AngularJS is due to the fact that almost all our latest templates have been created using AngularJS.

3D Wayfinder user interface is created with HTML. It is easy to implement any widget or integrate bus or cinema schedules inside wayfinding application user interface. Although it might be good to mention that for some of these features the API licenses are not free. If they are free then they are very limited.

Thanks to HTML5 based layouts it is easy to integrate different kind of widgets in wayfinding application. For example exchange rates, events, news, weather forecasts, social media feeds, CAP alerts, time remaining till closing.

« »

New Top View Feature in Our Editor

January 2, 2018

Sometimes it’s the small things that make all the difference. New “Toggle top view” feature in 3D Wayfinders administration panels editor is a useful tool that will give needed help to our users.

Toggle top view shows all the maps straight from the top and it works with both 2D and 3D maps. While this feature is selected, the rotation is disabled. This is most useful when marking paths on the map. It could also be used if you want to set kiosk view straight from the top on 3D maps.

New feature in editor

“Toggle top view” can be found on the top of the editor under “Settings“.

« »

Installing iBeacons is Easy

November 14, 2017

We have finished installation of approximately 250 iBeacons for mobile app positioning. Although the installation process is easy. There are some tricks and common practises to follow, when setting up iBeacon based indoor positioning.

iBeacons installation

iBeacons are cost effective indoor positioning devices, that are really easy to install. As each iBeacon has it’s own battery, that can last about a year, then there is no need for external power supply. Devices are very light, so it is possible to mount them by using double-sided tape.

Even though the installation of one iBeacon is a simple matter. Overall installation process can be quite long and somewhat physically exhausting due to the constant climbing up and down the ladder/platform.

At first glance it might seem that the device will disrupt the look of the building. But, as we can see from the image below, if you take into consideration the overall theme and look of the building during choosing of the device, it merges into the plethora of different sensors and equipment covering the ceiling.

Installing iBeacons

Before installing devices. It is important to mark down the specifications for each iBeacon device. Each iBeacon has it’s parameters: unique ID, name and range.

It is also a good practice to mark the iBeacons. So that you know you’re installing the correct device to the correct location. For this we used a label printer.

iBeacon

Plan before iBeacons installing

It is good to have a plan before physical installation. We used the map of the building to first draw a layout of the placement of the devices and their coverage area. It is a common practice to have a minimum of 3 iBeacons covering any part of the mappable area for the navigation to work efficiently.

iBeacon coverage map

Configuring iBeacons in 3D Wayfinder is also easy. Just create a node with type “iBeacon” and enter iBeacon parameters (UUID, Name etc.). To manage all the devices from one place, open “Beacons” from the left-side menu. You can do this prior to the actual installation when you are confident that your layout will work.

iBeacon management

It is highly recommended to install the iBeacons to a height unreachable for the visitors of the building, so no one could easily snatch them. We installed the devices onto the ceiling. For this we used a painters platform that had wheels on them so it is easy to move it around the building. We recommend setting the platform to a height so the person installing the devices could stand up straight and then reach the ceiling without having to stretch too much.

Good time to install iBeacons in a shopping mall is when there are not that many people.

Here you can find more information about using iBeacons with 3D Wayfinder. If you’d like to test iBeacon-based positioning, please submit the request form for demo iBeacons.

« »

3D Wayfinder had Guests From Tartu Art School

October 2, 2017

Our office was really crowded last week when we had visitors from Tartu Art School. More than 20 people who have just started their studies to become 3D modellers.

uus

Tartu Art School is the only school in Estonia that teaches 3D modelling and visualization as a vocation. As a part of their curriculum the students visit different companies to see how their skills could be used in the future.

Since 3D models have such a big part in our work, it is also important for us to introduce our company to potential future employees or users of our app.

photo_2017-10-02_11-59-01 visitors

So we talked about what we do and how we do it and how students could use our product. 3D Wayfinder is currently used for mostly way-finding applications. But that doesn’t mean it couldn’t be used in variety of cases. It’s also perfect for presenting architectural models or – why not – make a virtual art gallery.

It is interesting and useful for us to see what kind of applications the students can find for 3D Wayfinder. So we can make it more flexible and beneficial for a wider range of customers.

« »

3D Wayfinder User Manual is Updated

September 28, 2017

Many things in our new administration panel work a little bit differently than they used to. If you need help to figure things out, check 3D Wayfinder user manual.

User Manual

We have updated all the topics and we add information when new features are added. You can find 3D Wayfinder user manual from our web page under “Docs” from main menu or you can use the direct link https://3dwayfinder.com/documentation/user-manual/

User manual for our previous administration panel is also still available, you can find it here: https://3dwayfinder.com/documentation/user-manual/#5

« »

New Administration Panel is Up and Working

September 7, 2017

It has taken some time and lots of effort but we have finally made it. New 3D Wayfinder administration panel is finally online and usable for all clients.

new admin

We have made many smaller and bigger improvements to make 3D Wayfinder administration panel  easier to use. Especially for new clients. For example the editor has been changed to make it more logical. All the materials have previews for better overview and managing of 2D maps is more convenient.

It should also be more comfortable for those who prefer to use our app on smartphones or tablets.

There are still some kinks to straighten out so if you notice something that isn’t working the way it is supposed to, let us know.

“Sign in” leads straight to new administration panel but if you prefer to use the old one, go to old.3dwayfinder.com or use the link at the bottom of the sign in page. 

« »

Keeping Floor Plan Editor Idle in the Background

August 1, 2017

The new 3D Wayfinder Administration Panel is centered more around the floor plan editor. To provide better usability we keep the 3D editor idle when moving away to other pages. So switching between editor and other views is much faster now.

The new Administration Panel has been publicly available for testing since the beginning of this year. At the end of the summer we will only support the new administration panel. Although the current administration environment will be available for some time.

Loading the 3D floor plan editor takes a couple of seconds because we need to load 3D floor-plans models and also additional editor tools. Now when the editor is always in the background. We do not need to load the 3D editor again. This makes the usage more faster and user friendly.

new 3D floorplan editor

Our new administrator panel is being built on Angularjs. To achieve loading of editor once we have created the service that holds the canvas element. It is also attached our editor API to it. Controller then adds canvas to the editor view and provides connection to API actions.

To see and test new Administration panel and floor plan editor, please log in here. If you don’t have an account with 3D Wayfinder, you can create it here for free.

« »

Wayfinding Kiosk with Raspberry Pi

July 11, 2017

We have recently experimented with a Raspberry Pi 3 Model B, to see how it can work as media player for digital signage display or wayfinding information kiosk. As a result we can say, it works well with 2D wayfinding maps and with 3D Wayfinder Advertisement Module.

What is Raspberry Pi?

Raspberry Pi is a small credit card sized linux based open source computer. It is equipped with:
– Broadcom 64-bit quad core CPU clocked @ 1.2 GHz,
– 1GB of RAM,
– built-in WLAN and BLE modules,
– HDMI output.

But everything is soldered to the board hence there is no option to upgrade, except for the microSD card. You can also have a nice box for it, so it doesn’t look like a hackers development board.

Raspberry Pi

Compared to other small form factor computers like Intel NUC or Gigabyte BRIX, it is much cheaper. Raspberry Pi with a nice case and microSD card would cost about 50..70 USD. The NUC or BRIX boxes start at 110..130 USD new, and you still need to equip them with a hard drive (SSD/HDD) and memory module(s) (DDR3/DDR4 SO-DIMM RAM) which would cost you about an extra 30 USD for a 32GB SSD and ~25 USD for DDR3 or ~30 USD for DDR4. Totalling up to about 165..190 USD.

Raspberry PI plays in Full HD, so it is not a problem to use large resolution screens.

Wayfinding with Raspberry Pi

Enable WebGL

For 3D the Raspberry is still a bit weak and by default it doesn’t have WebGL enabled. To enable WebGL you have to:
1. Open up the terminal application (or command prompt if you prefer to call it that)
2. run command sudo raspi-config
3. navigate to Advanced Options
4. enable GL support.

The GPU on the Raspberry PI 3 Model B doesn’t support floating point textures, so we cannot use transparent textures.

To build wayfinding or digital signage project based on Raspberry Pi you need to use a special linux distribution that opens a browser in full-screen mode instead of the regular desktop interface.

At the same time the kiosk based on Raspberry Pi is quite bullet-proof. There’s no need to worry about excessive power consumption as it actually only consumes about 3.7W under full load and only about 1.4W when playing a FullHD video, which is roughly 10% of the Intel NUCs ~38W while under full system load and ~18W while watching a FullHD video.

chart

It boots up fast from a microSD card which can be easily replaced when it wears out or breaks.

Although remote managing a kiosk that uses a Raspberry Pi can prove to be quite a cumbersome task as you cannot use regular GUI remote management tools like Teamviewer or LogMeIn. The fastest way to remote manage the Raspberry Pi is to use SSH, which is a CLI (Command Line Interface) and this might scare-off most of the users that are not used to poking around via a CLI.

« »

Building Kiosk for 3D Applications

May 12, 2017

We have developed an interactive kiosk for 3D applications. The kiosk is equipped with a landscape LCD screen, a touch panel and a dedicated graphics card which makes it suitable for applications that require greater graphical computing capabilities.

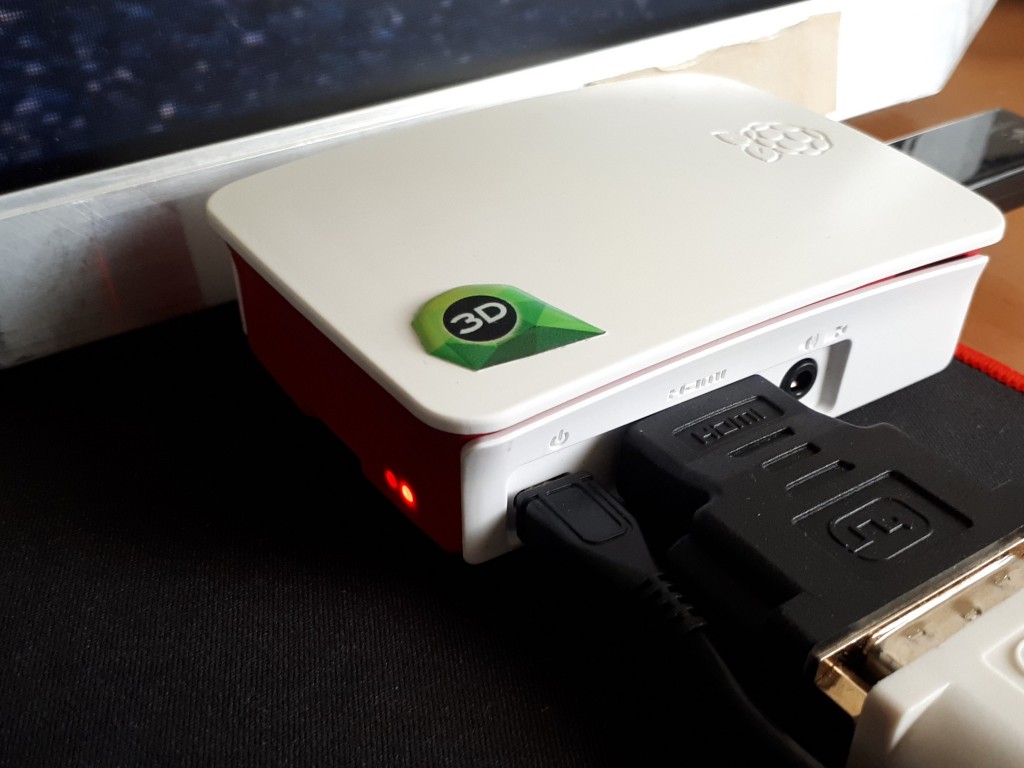
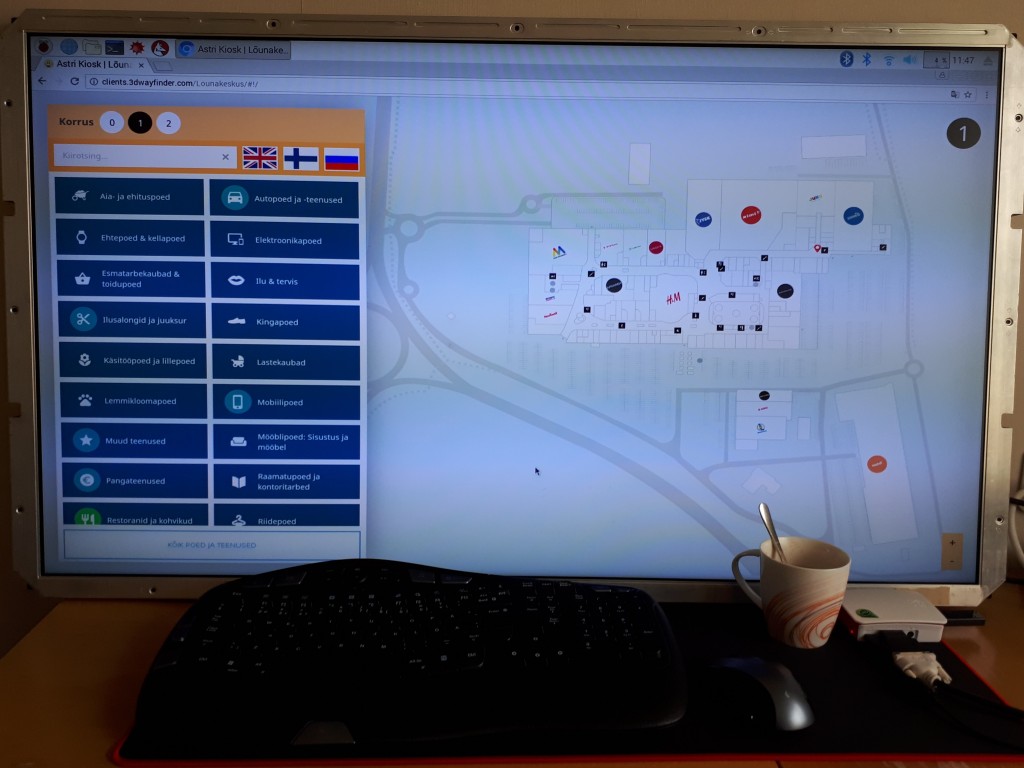
Most of the modern kiosk hardware is made as thin as possible and in most cases kiosk hardware use small PC-s like Intel NUC’s or even USB stick like Intel Compute Sticks. This is enough for showing advertisements or 2D wayfinding plans, but for larger 3D applications these PCs tend to be too weak. For one of our latest projects we had a challenge to create a special kiosk, where we could put a regular size motherboard and graphics card. The outcome is quite impressive and we are definitely taking this 3D kiosk further so we can provide it to other customers also. It can be counted as first Gamers’ kiosk PC in the world.

kiosk_for_3D_applications

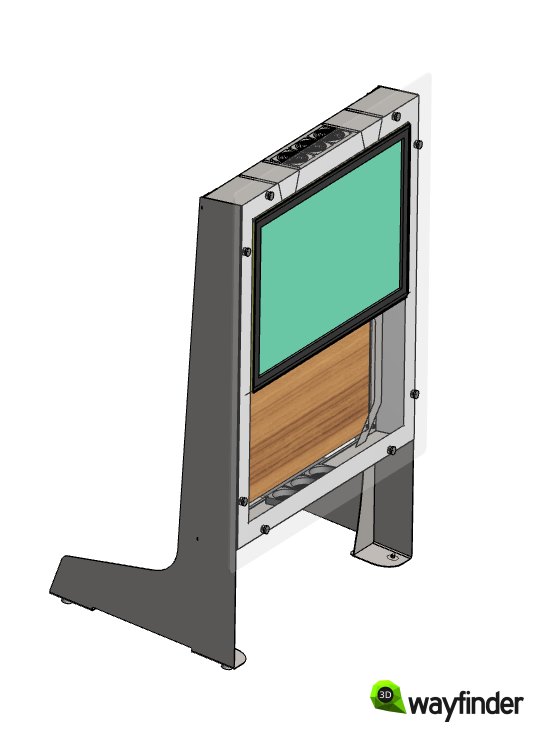
The kiosk is built on a metal frame, that supports the 8 mm tempered glass and holds the touch screen and computer hardware. The metal frame has enough weight and the screen is leaning back in a light angle. So it stays firmly on the ground and so there is no need to mount it to the floor.

3D_kiosk_metal_frame_supporting_LCD_touch-screen

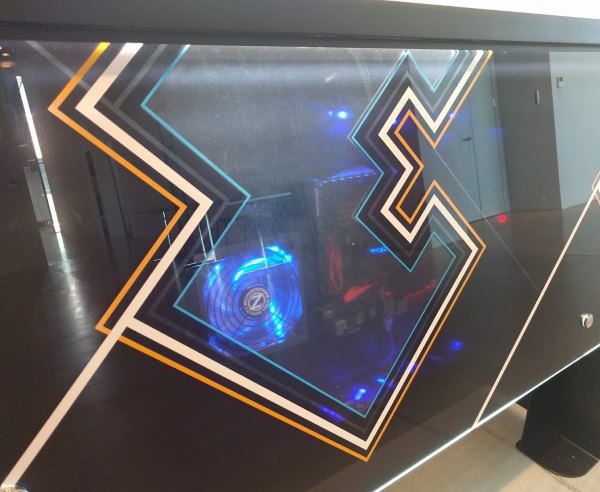
For the computer we used regular PC components. The idea was to make the inside visible through the glass, so we put the emphasis on the looks of the components. We used components that had LED-lights so it would make a impressive light show. To place graphics cards separately, PCI Express riser cable was used. Common riser cables are white/grey color, but we needed the black one, so it would also look nice.

3D_kiosk_PC_with_GPU

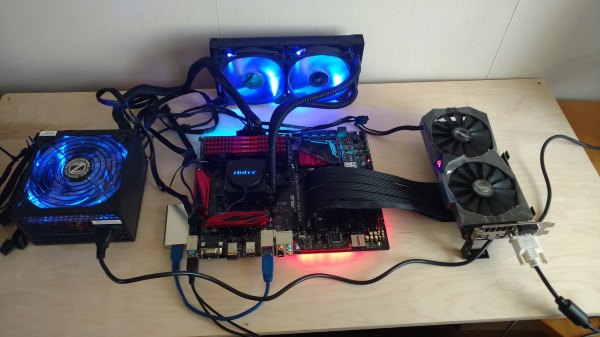
In current kiosk we used ASUS B150 Pro Gaming motherboard with Intel Core i5-7400 CPU cooling with Antec Kühler H2O H1200 watercooling. Power supply is 700W Zalman 700TX. Graphics card is ASUS GeForce GTX 1050 Ti, but it was planned to upgrade GPU when needed.
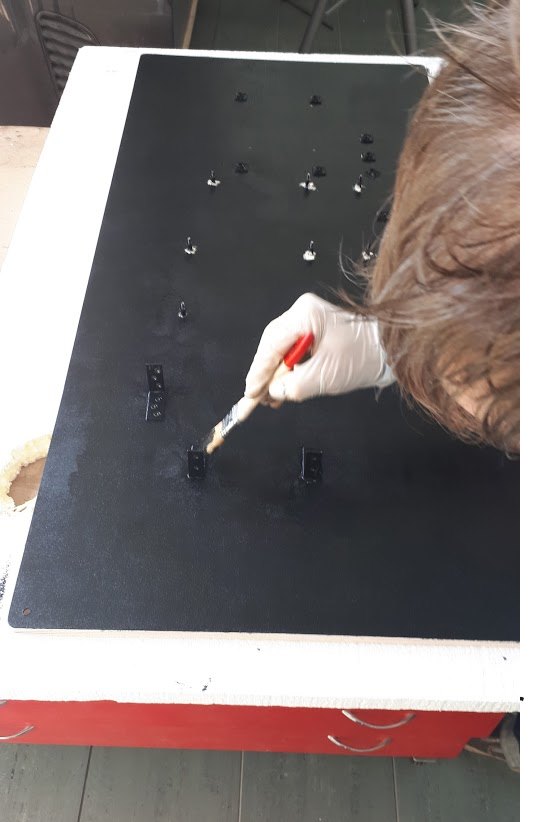
After aligning all the components and making the cabling in proper way, we painted the plate black. It is important to fix and align all the cables, otherwise it wouldn’t look nice. Especially as the PC plate will be partly visible through the covering glass of the kiosk.

3D_kiosk_PC_plate_painted_black

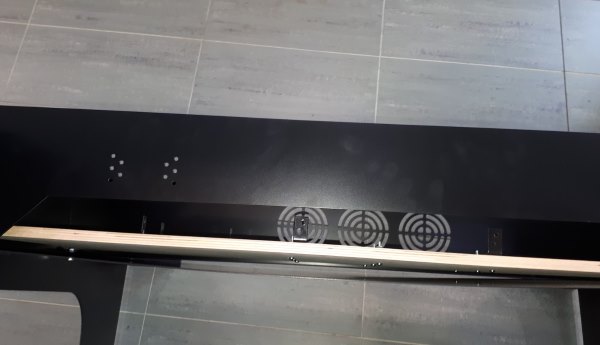
Kiosk has 3 vents for blowing the air out from the bottom of the frame. On top of the kiosk we have also 3 vent openings, that are being used for air intake. It is possible to use there alsovents, but in current installation we just put there dust filter.

3D_kiosk_ventilation_holes_in_frame

Glass has been mounted to metal frame by special glass mountings. It is possible to paint the glass from both sides to make kind of 3D effect. In current case we used customer’s corporate design elements, which were lines. The background is dark gray, but not in full color, so it is possible to see through it. Also it has a special “window” for looking at kiosk heart – the PC built on wooden plate.

3D_kiosk_PC_GPU_LED_lights

On the inner side of the glass we have installed LED bar, so the edge of the glass is shining. The light also reflects the printed pattern on the back. In our case we used gray, so the effects are not that visible.

3D_kiosk_with_glass_LED_lights

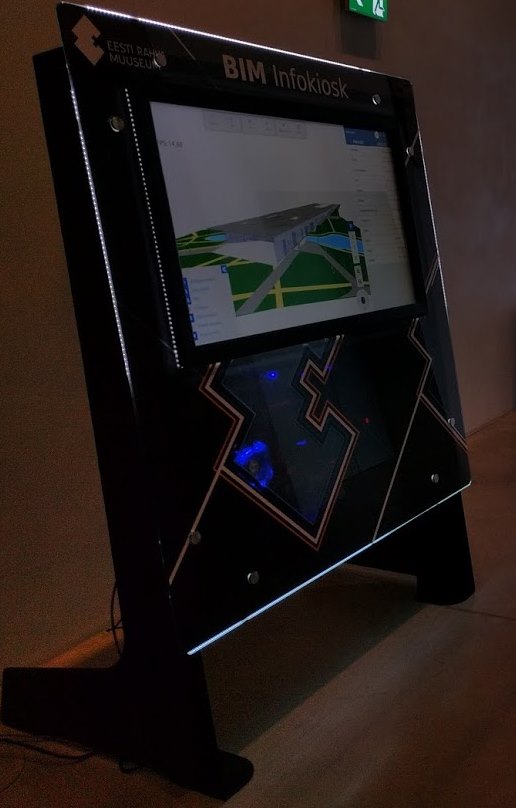
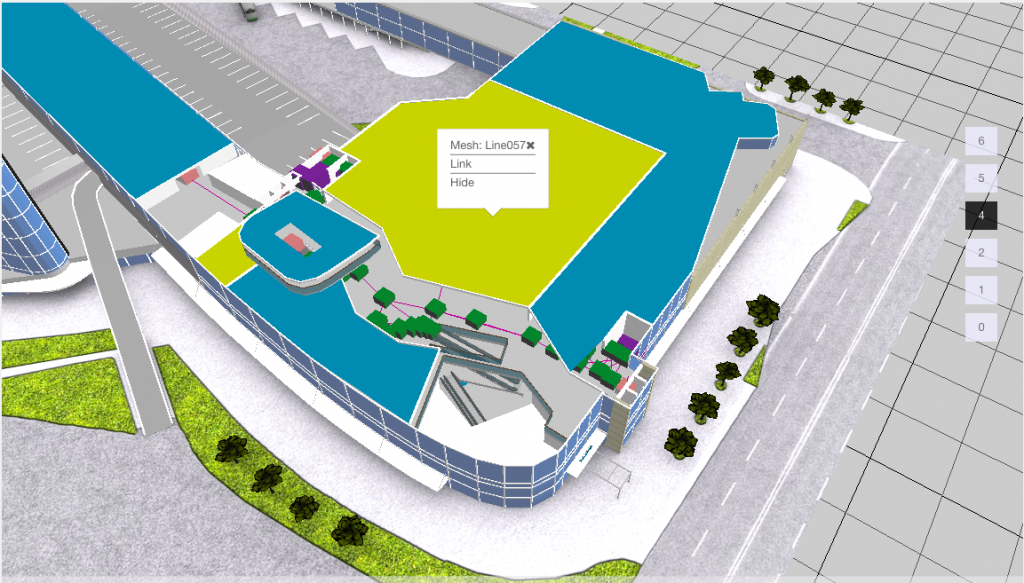
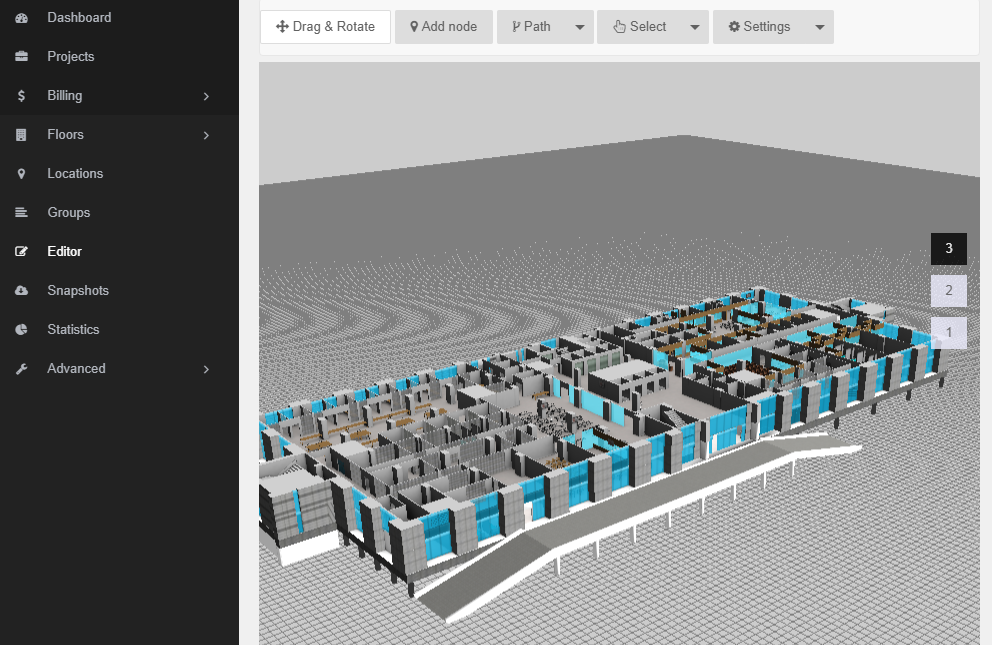
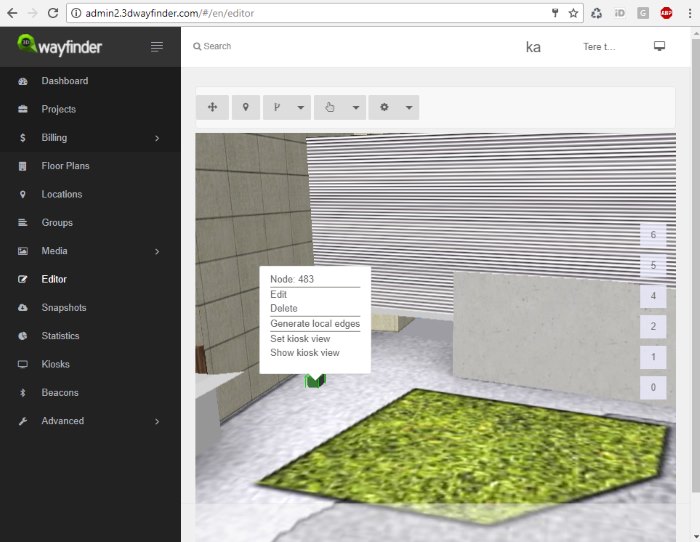
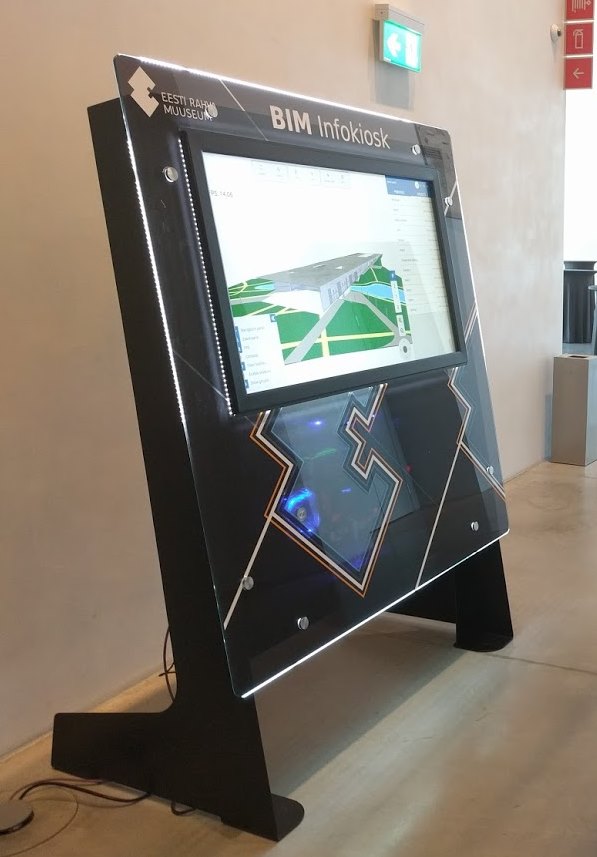
The kiosk was created for special building information (BIM) application in Estonian National Museum. There are over 10 thousand elements in this 3D model. This has been so far the largest 3D model used in 3D Wayfinder. When on high end laptop the application is running on around 5 FPS, then in this kiosk it is more than 15 FPS. More detailed overview of the BIM application is coming soon.

Glass was created by Glasstech and kiosk frame was designed and manufactured by Hecada.

« »