Moving Camera According to Path

March 2, 2016

There is option now to moving camera with path animation. This makes the path visualization even more effective with 3D floor-plans and maps. Especially when combining with directions.

So far there were 2 ways to show the path: draw the path animation or show the walk from first person view. Like you see the 3D in computer games. With usual path visualization the map was zoomed out, to fit the whole path on the screen. But this might make the understanding of recommended path a bit complicated. Mostly when the map is large and complicated.

moving_camera_with_path_animation

With moving the camera with path animation it is possible to keep the “You are here” view to the map, including angle and zoom level. Of course it is always possible to zoom in or out during the path animation and rotate the map (if it is allowed). The camera will keep following the path to the guided destination.

Path visualization behavior can be adjusted under Settings in 3D Wayfinder Administration panel.

« »

Exporting 3D Models From 3ds MAX

February 5, 2016

3ds Max models cannot be used directly in 3D Wayfinder, as .max format is closed file format and our importer doesn’t support it. But exporting 3D models from Max is not complicated.

3D Wayfinder supports following formats for 3D models: .fbx, .dae, .lwo, .obj and .3ds. But as we are using ASSIMP for model converting it is possible to try also other formats. With 3ds Max, we recommend to use  .fbx or .dae formats.

To exporting 3D models from Max follow these instructions:

1. When exporting models always select what You want to export and then “export – export selected”.

export_3ds_max_selected

2. Set proper export settings.

If You want to export .fbx use these settings on the picture:

fbx_export_from_3ds_max

Pay attention that “triangulate” has to be selected and up axis is “Y-up”. Otherwise the 3D model will be flipped in 3D Wayfinder.

If You are exporting .dae then use only OpenCOLLADA exporter and these settings:

export_dae_from_3ds_max

There are some minor differences with .dae and .fbx files. You just have to test, what suites better. All the materials can be tuned in 3D Wayfinder Administration panel (see the tutorial), so you don’t have to worry about ambient colors, transparency or other material properties.

We recommend that the whole building should not have more than 100 000 polygons. For kiosk applications (where it is possible to use better GPU-s) you can also have much larger models.

« »

New Features in 3D Wayfinder

January 15, 2016

With the end of 2015 and the beginning of this year there are many new features added to 3D Wayfinder. The goal of these changes was to add flexibility to customizing the behavior of the 3D map and wayfinding. Custom models for path, path types, POI options and many more.

In parallel with large customer projects, we have added many new features to 3D Wayfinder. Most of them were requested by our customers and we have added them as features/settings for all our users. Below are listed the most important ones.

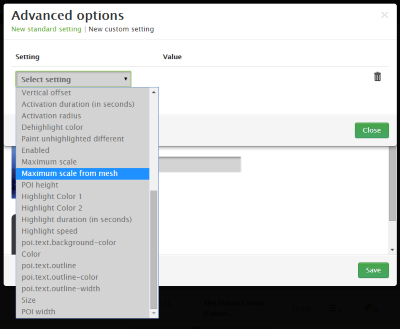
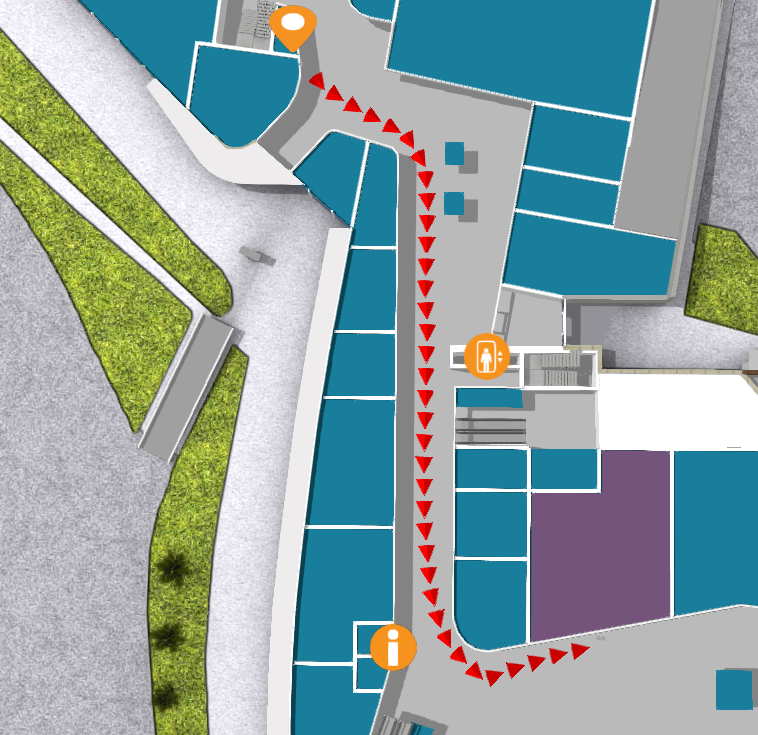
Custom models for path visualizationcustom_path_models_wayfinding

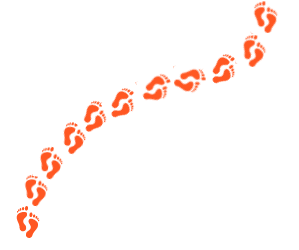
It is now possible to choose your own custom models for path visualization. Path models can be different kind of arrows, footprints or simple tubes/lines. Changing path visualization models can be done under settings.

In near future we’ll add some sample path models also to our blog.

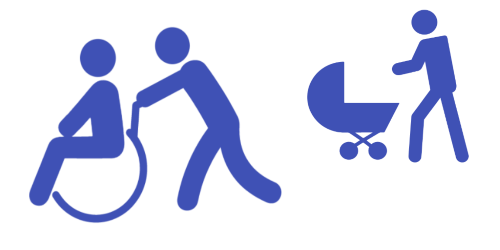
Path types and accessibility paths

It is now possible to add different kind of inaccessibility attributes to the path . This can be used for defining paths  that are also accessible with wheelchairs and/or baby strollers. This also enables defining other kinds of areas, like paths for service personnel etc.

Currently it has to be entered to the node attributes in json object format:

{

“inaccessibility”: [

 “wheelchair”

]

}

wheelchair_wayfinding_inaccessibility_Path_types_and_accessibility_paths

The nodes with these kind of restrictions cannot be used for path finding with “wheelchair” option. It is useful to set these restrictions for stairs or doors.

To use the inaccessibility in user interface, you have to change the accessibility option first:

this.wayfinder.accessibility = “wheelchair”;

Then it is possible to use the same show path method:

this.wayfinder.showPath(poi.node, poi);

And after showing path, just change the accessibility option back to blank:

this.wayfinder.accessibility = “”;

Also check out our blog post about how to set up time dependent navigation rules.

POI specific options

Advanced_POI_settings_specific_options

It is now possible to create special settings for each POI (location). These settings can be chosen from the list of all POI settings, like the size of the billboard image or billboard text size, highlight color, activation radius, billboard height etc.

This feature allows to customize the map by locations, for examples larger shops can have larger texts or text colors can be set by each shop. Also it makes easier to use logos or icons on the map, as the billboard images don’t have to be the same size anymore.

In the future it is possible to add new settings that can be used when developing your own template.

Top-down view for Path showing

path-top-down-view-for-path-showing

Now there is a simple option under settings to turn the map to top-down view when showing the path.

In general it is not a good idea to show the “You are here” location from top-down view, but rather  from certain angle (especially when it is possible with real 3D models as in 3D Wayfinder), which provides a better overview of the map and also makes the map look better.

Now when using the same angle, as displaying the “You are here” location, and visualizing the path, it may happen that the visualized path might not be visible. This is due to tall objects like walls that might block the view of the path. Using the top-down view during path visualization solves this problem.

Pause options between changing floors

According to valuable customer feedback, the transition of switching floors happens too quickly , which might be a bit confusing for the end-users. We solved this issue by adding the “pause-time” option to the settings. With this option it is possible to adjust the duration of the pause before switching to the next floor. The pause duration can be defined in seconds,  which makes it easiest to find  the proper delay that helps  all wayfinder users to understand, which floor they have to go to.

Kiosk view enhancements

In addition to being able to save the view angle, it is now possible to save the zoom factor for “kiosk view”. By clicking the “You are here” button, the map assumes the “kiosk view” saved in the editor.

In the future we will add this view option as a separate object so the view can be linked with any location or node.

« »

New Reflection Feature in Our 3D Engine

December 18, 2015

FRAK WebGL engine has now built in Cubemaps and reflection shader. This gives 3D Wayfinder access to use reflections of surrounding area.

We have added built in cubemaps and cubemap reflection shader to FRAK WebGL engine. In addition reflection with cubemaps is efficient way to create reflective surfaces like glass or mirrors.
Also cubemap reflection is a rendering method. It means that reflective surfaces reflect the cubemap textures.

Cubemaps_and_reflection_shader_frak_reflections_webGL

It will be available for 3D Wayfinder in near future. This will be the effective way to create large glass walls or buildings. It make them more realistic. It might be used also for expensive shopping mall floors.

Next feature in FRAK will be specular map to mark efficiently reflective areas.

Cubemap demo can be found under FRAK repository.

« »

3D Wayfinder is Sponsoring CG Architecture Challenge

October 29, 2015

CGTrader is organizing challenge called “CG Architecture Challenge”. More than 240 thousand 3D enthusiasts and designers have been invited to participate. 3D Wayfinder has set awards for each challenge subcategory. Award will be given for the best 3D CG model or visualization uploaded during the challenge period.

The challenge will take 3 months and there will be 3 individual winners in each architectural category. Categories are: Best Architectural Interior Model; Best Architectural Exterior Model; Best Architectural Details Model and Best Architectural portfolio. Read more from cgtrader.com. In addition winner in each category will get 3D Wayfinder Pro account for a year.

CGTrader is a 3D model marketplace for computer graphics and 3D printing. For example 3D artists and designers share and sell their models. Then they get valuable feedback, learn from peers, and interact in a designer-friendly environment.

Here are 2 winning works from last year challenge:

Best 3D Architectural Exterior model 2014
Best 3D Architectural Exterior model 2014.

1st Runner-up in Best 3D Architectural Exterior model 2014
1st Runner-up in Best 3D Architectural Exterior model 2014.

« »

Towards Rule-Base Wayfinding

September 25, 2015

Future in wayfinding includes definitely possibility to create complex rules for path finding. Now there are also node restrictions in 3D Wayfinder to specify working days etc.

One of the last addition to 3D Wayfinder was node weights for calculating optimal paths. This made possible to guide visitors in some recommended way. Now there is also possible to restrict some nodes based on time and day.node_restrictions_wayfinding_paths_by_date_and_time

In many public buildings, there are rules for locking doors, elevators or gates. There can be different areas open during working hours than weekends or night times. This is common for shopping malls, train stations, university campuses etc. Even large office buildings are keeping some doors open during the weekends as there might be service providers like dentists, children playrooms etc. When providing wayfinding to your visitors, it is important to follow the same rules.

With 3D Wayfinder, it is possible now to create path restrictions according to work-day and time. To create this kind of restrictions, just open node attributes under editor.
Under Node attributes in 3D Wayfinder Editor, there can be entered JSON. In future we will provide also special UI for that.

Here is the example that will allow to pass the navigation node from 10AM to wayfinding_paths_restriction_node_attributes9PM:

{
“allowedTimes”: [
[
10,
21
]
]
}

Adding other blocks, you can also specify by days.

We are currently developing also other rule types, like security or accessibility. These rules help to create adaptable and user-friendly way-finding applications which are useful and finally elementary for large buildings.

« »

3D Interactive Floor Plan Demo

September 8, 2015

Check out our new 3D Wayfinder platform demo. This will give you short overview of what you can do with 3D Wayfinder and what are our API capabilities.

The demo has following topics:

  1. Moving 3D map with mouse cursor or touch screen.
  2. Clicking on the map and getting location name and description.
  3. Changing floors of the building.
  4. Showing path between 2 locations.

Demo is accessible from the 3D wayfinder home page and can be opened also from this link:

[xyz-ihs snippet=”3D-demo”]

Demo is based on following javascript code. You are welcome to use it in your projects, your HTML should contain canvas with ID “map”. For more info please see 3D Wayfinder embedding tutorial.

var wayfinder;
var map;
var mapContainer;
var poiInfo;
var tutorialArea;
var currentStep = 0;
var STEPCOUNT = 3;
var originals = {};
var floors = {};

function mapResize(){
	if(wayfinder){
		cont = mapContainer.find(".map-area");
		map.attr("width", cont.css("width"));
		map.attr("height", cont.css("height"));
		wayfinder.resize();
	}
}

function runDemo(){
	map = $('#map');
	poiInfo = mapContainer.find("#poiInfo");
	tutorialArea = mapContainer.find(".tutorial-box");
	wayfinder = new Wayfinder3D();
	wayfinder.options.assetsLocation = '//static.3dwayfinder.com/shared/';
	wayfinder.open("1a07bdc53edb3828f390bc9af7281585");
	setTimeout(mapResize, 150);

	wayfinder.cbOnProgress = function(percentage){
		$("#progression").css('width', percentage * 100+'%');
	};

	wayfinder.cbOnDataLoaded = function(){
	    mapContainer.find(".loading-screen").hide(100);
	};

	wayfinder.cbOnMapReady = function(){
		removeAllFunctionality();
		setText(0);
		stepTutorialButtons(0);
	};
}

function stepTutorialButtons(step) {
	var prev = tutorialArea.find(".tutorial-prev");
	var next = tutorialArea.find(".tutorial-next");

	if (prev.text() && step === 0)
		prev.text("").off("click").css("cursor", "auto");
	else if (!(prev.text()) && step !== 0)
		prev.text("<").click(previousStep).css("cursor", "pointer");

	if (next.text() && step === STEPCOUNT)
		next.text("").off("click").css("cursor", "auto");
	else if (!(next.text()) && step !== STEPCOUNT)
		next.text(">").click(nextStep).css("cursor", "pointer");
}

function removeAllFunctionality() {
	if (wayfinder) {
		if (wayfinder.poiController) {
			originals.onPOIClick = wayfinder.poiController.onPOIClick;
			wayfinder.poiController.onPOIClick = function(poi, position, event) {};
		}
		originals.cbOnPOIClick = wayfinder.cbOnPOIClick;
		wayfinder.cbOnPOIClick = function(poi) {};
	}
}

function setText(step) {
	var keep = tutorialArea.find(".tutorial-text").find(".keep");
	if (keep.length)
		keep = keep.detach();
	switch (step) {
		case 0:
			tutorialArea.find(".tutorial-text").text("Click and drag on the map to move or rotate.");
			break;

		case 1:
			tutorialArea.find(".tutorial-text").text("Click on a location for more info.");
			break;

		case 2:
			tutorialArea.find(".tutorial-text").text("Click on a button to show that floor.");
			break;

		case 3:
			tutorialArea.find(".tutorial-text").text("Click on the button to show the path between two random locations.");
			break;

		default:
			break;
	}
	if (keep.length)
		tutorialArea.find(".tutorial-text").append(keep);
	stepTutorialButtons(step);
}

function addFunctionality(step) {
	switch (step) {
		case 1:
			if (wayfinder && wayfinder.poiController) {
				wayfinder.poiController.onPOIClick = originals.onPOIClick;
				wayfinder.cbOnPOIClick = function(poi) {
					poiInfo.show(100);
					poiInfo.find(".title").text(poi.getName("en"));
					var poiDescription = poi.getDescription("en");
					if (poiDescription)
						poiInfo.find(".description").text(poi.getDescription("en"));
					else
						poiInfo.find(".description").text("");
				};
			}
			break;

		case 2:
			poiInfo.hide(100);
			poiInfo.find(".title").text("");
			poiInfo.find(".description").text("");

			if (wayfinder) {
				var showFloor = function() {
					var f = $(this).attr("data-floor");
					if (f in floors)
						wayfinder.showFloor(floors[f]);
				};
				var fs = wayfinder.building.getFloors();
				tutorialArea.find(".tutorial-text").html("<div class='keep'></div>");
				var floorsMenu = tutorialArea.find(".tutorial-text").find(".keep");
				for (var i in fs) {
					if (fs[i] && fs[i].showInMenu) {
						floors[i] = fs[i];
						var button = $("<button data-floor='"+i+"'>"+fs[i].getName("en")+"</button>").click(showFloor);
						floorsMenu.append(button);
					}
				}
			}
			break;

		case 3:
			if (wayfinder && wayfinder.logic) {
				var randomPath = function(times) {
					if (typeof times !== 'number')
						times = 1;
					if (times > 9)
						return;
					var poiList = wayfinder.pois;
					var poiIDs = [];
					for (var i in poiList) {
						poiIDs.push(i);
					}
					var rand1, rand2;
					while (!rand1 || !(poiList[rand1].getNode())) {
						rand1 = rand2 = poiIDs[Math.floor(Math.random() * poiIDs.length)];
					}
					while (rand2 == rand1 || !(poiList[rand2].getNode())) {
						rand2 = poiIDs[Math.floor(Math.random() * poiIDs.length)];
					}
					rand1 = poiList[rand1].getNode();
					rand2 = poiList[rand2].getNode();
					try {
						wayfinder.logic.showPath(rand1.id, rand2.id);
					}
					catch (e) {
						// Try again
						randomPath(times + 1);
					}
				};
				tutorialArea.find(".tutorial-text").html("<div class='keep'></div>");
				var area = tutorialArea.find(".tutorial-text").find(".keep");
				var pathButton = $("<button>Show random path</button>").click(randomPath);
				area.append(pathButton);
			}
			break;

		default:
			break;
	}
}

function removeFunctionality(step) {
	switch (step) {
		case 1:
			if (wayfinder && wayfinder.poiController) {
				wayfinder.poiController.clearHighlights();
				poiInfo.hide(100);
				poiInfo.find(".title").text("");
				poiInfo.find(".description").text("");
				wayfinder.poiController.onPOIClick = function(poi, position, event) {};
				wayfinder.cbOnPOIClick = function(poi) {};
			}
			break;

		case 2:
			tutorialArea.find(".tutorial-text").find(".keep").remove();
			break;

		case 3:
			addFunctionality(2);
			break;

		default:
			break;
	}
}

function previousStep() {
	if (currentStep === 0)
		return;
	removeFunctionality(currentStep);
	currentStep--;
	setText(currentStep);
}

function nextStep() {
	if (currentStep === STEPCOUNT)
		return;
	currentStep++;
	addFunctionality(currentStep);
	setText(currentStep);
}

$(function(){
	mapContainer = $("#demoMap");
	$(".home-video").click(function () {
		mapContainer.show(100);

		if(!wayfinder)
			runDemo();
		else
			wayfinder.engine.run();

		$(window).resize(mapResize);
	});
});

« »