How to Cut Costs With Wayfinding Software?

November 16, 2022

It is obvious that the economy is currently in a downward trend. More and more questions rise in this regard. How can we save money and energy? Globally, more and more people are talking about saving energy. This is definitely one place where different service companies could save. In addition to energy savings, financial savings are also important. By using the 3D Wayfinder software, it is also possible to save money quite realistically.

We have previously introduced you how to earn revenue with wayfinder software, in this post we will talk about how to save through the wayfinding software.

Certainly, many shopping center managers notice that purchasing power is decreasing. The global economic recession is mainly to blame for this. When the economy is booming, people shop more and spend more money. When the economy is down, people think more carefully about where they spend their money. Might be that some people even deliberately distance themselves from shopping malls so as not to make reckless spending.

Save on labor costs

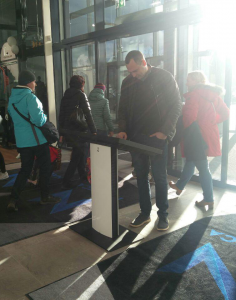
The biggest cost savings comes from labor costs. Have you thought that there is an employee in your company or institution whose work could be done by some software? For example, there are often information workers in various office buildings, shopping centers or airports. What role do the employees at the information desk mainly play? Most of the time they guide people. People use information boards to find a way to store or special room. By using the 3D Wayfinder, it would be possible to save on the salary costs of one or even several information/help workers. This is probably one big and thought-provoking place where you can cut costs with wayfinding software.

Save money by reducing printed signs

In public buildings one of the administrative expenses is certainly different signs. Business signs must be changed when someone moves out or joins. 3D Wayfinder can also help here. Using wayfinding software reduces needs for different signs and printed floorplans. Building directories and maps can be digital and can be changed without the need for printing and changing physical signs. It is even possible to install digital screens in elevators.

Using digital wayfinding also helps to save on administrative costs. In addition, it is easier for the administrative manager of the building to change tenant or rental information in one place digitally than replacing installed physical signs.

Less energy with sleep mode

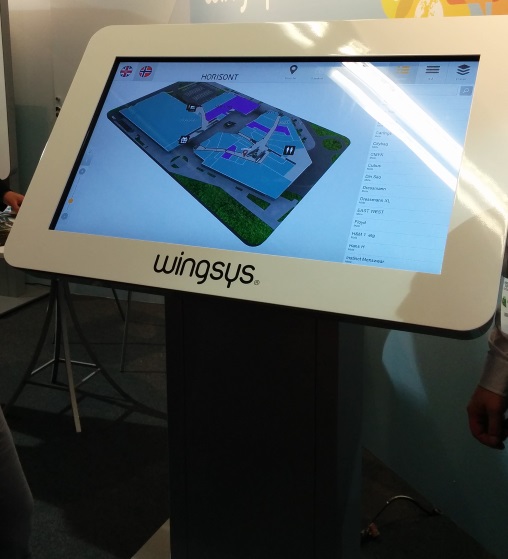
One of the ways to save energy is forcing wayfinding kiosks to go to sleep mode. Sleep mode is a widely known term and probably everyone who uses a computer or smartphone is familiar with it. It is possible that many 3D wayfinder customers may not know that sleep mode can also be set for wayfinding kiosks. When there is no activity in the building and the doors are locked, the wayfinding kiosk can also be in sleep mode.

Sleep mode can also be used when the building is open. The kiosk can be set in such a way that the screen is completely dark or, for example, with the text “Click here for building map” etc. when no one is using the kiosk. When a person touches the screen, the screen becomes active and can be used.

Save with dark mode

How else would it be possible to save with wayfinder software? One of the ways to save energy could also be using dark mode. At wayfinding kiosks, it is possible to set the screen light to be brighter and darker. Darker screen use less energy.

Save with wayfinding software. Energy saving and financial savings is important for service companies.
Landscape template normal bright version
Save with wayfinding software. Energy saving and financial savings is important for service companies. Cut for labor costs and use darker mode.
Landscape template dark mode

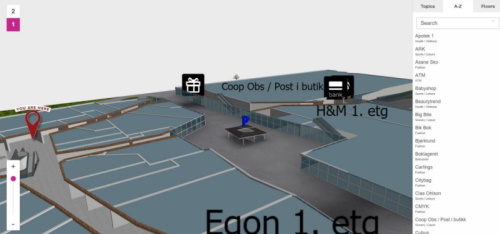
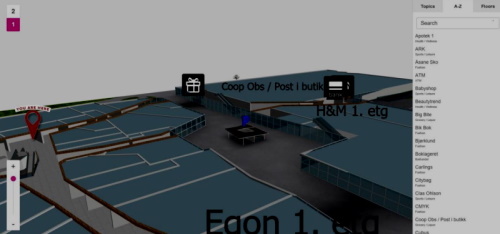
The difference between the two images is quite large and can be startling when compared like this. In addition to saving energy, it is also better for the eyes. In any case, the customer receives the information in exactly the same way as if it were on a screen with full brightness.

3D Wayfinder offers the possibility to set the display of the kiosk in time. For example, it is possible to set the time when the screen goes into dark mode. It is also possible to set the screen based on the surrounding light. For example, if the lighting in the building is bright or the sun is shining, the screen will be brighter. If the lighting is darker, the screen will also automatically darken. Dark mode saving is easy way fot cut costs with wayfinding software.

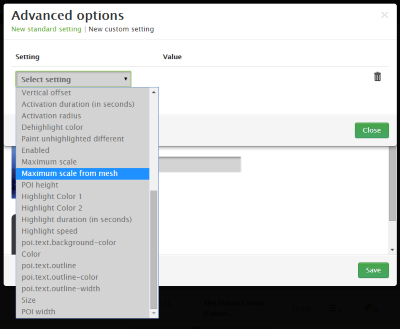
There is also an option to use a different background color. You can choose the background colors for building maps in 3D Wayfinder. If you want to save energy, it would be wise to use a darker background. If the card has a darker background, it saves more energy because the screen doesn’t have to be so bright. Also, a darker background can sometimes work even better. On a darker background, it’s better to highlight some objects that don’t come out as smooth on a light background. This is an option that should be considered when starting to order a house manager or create one yourself.

Smart wayfinding

Do you know that 3D Wayfinder indoor positioning software using smart wayfinding technology?

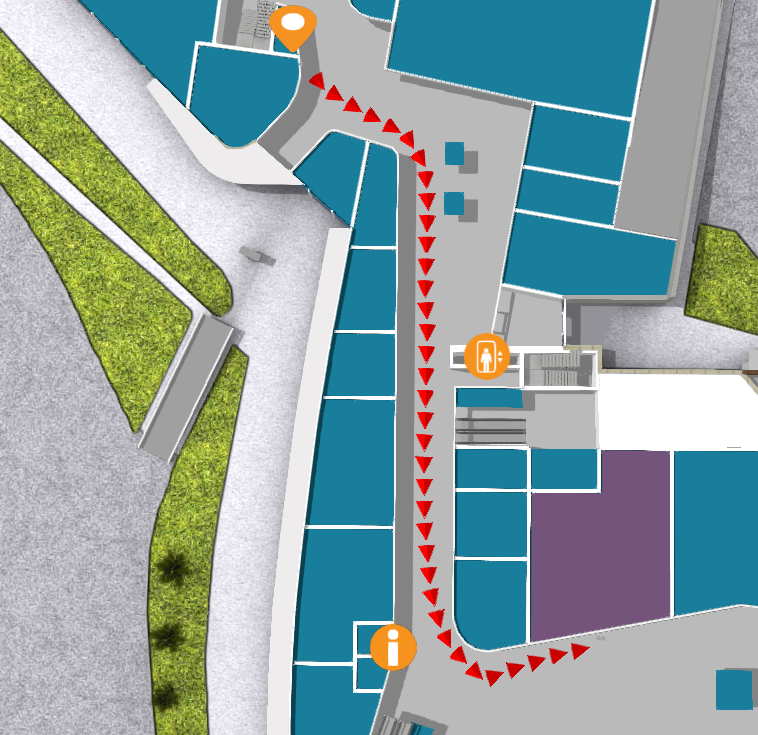
Smart wayfinding is easy. The person who makes 3D Wayfinder map can choose how they want the path to be guided. For example, it is possible to guide the way that elevators are avoided. Moving the elevators up and down is probably also a big administrative expense. However, if people are guided so that they are directed to the stairs, it is possible to regulate the use of elevators.

3D Wayfinder supports energy saving. We support saving people’s time by providing innovative wayfinding software. We are environmentally friendly and recommend it to all our customers. If you are already using 3D Wayfinder you can change settings for saving energy or ask help from our team. If you are not yet using wayfinding software, then please contact our sales department. We will definitely find the best solution for you and help you cut costs with wayfinding software.

« »

Wayfinding Kiosks are Part of Renovating a Mall

January 4, 2018

Harbour placed shopping mall Nautica has got a new name and a new look. After rebuilding the shopping mall, two wayfinding kiosks were also placed. Although the mall is not large, the wayfinding feature is really important for them.

Nautica-kaubanduskeskus

Nautica mall in Tallinn, Estonia reopened in the end of 2017. It has only about 60 shops but wayfinding kiosks are more important than ever after the renovations. Old shops are in new places, new shops have been advertised but neither the old or new clients know where to find them.

In Nautica things are made even more difficult. Because a new floor was added and most of the restaurants, ATM-s and bathrooms are placed there.

Kiosks in Nautica are simple and practical. They don’t take a lots of room and their slanted design indicates immediately that the screen. Even though it might have an advertisement as a screensaver – is meant for customers to use.

nautica_wf_kiosk

Kiosks are conveniently placed by the doors of the two main entrances. These are the first things that every customer sees when they enter. Placement like this makes it easy for visitors to notice. They don’t need to start looking for maps or signs when they are not sure where they should go.

It is also practical because it’s more likely for the visitor to take notice of the kiosk right after entering than in the middle of the busy mall. So when they need to use it later, it’s easier for them to remember where to find it.

nautica_kiosk

The design for the new template was provided by the mall. We only needed to bring it into reality. They wanted a stylish and simple look with clear and easy to use interface. They also wanted to have all the shop names displayed on default screensaver, slowly rolling by on the screen. This animation with shop logos also works on map view. If the customer hasn’t touched the screen for a little while.

« »

Installing iBeacons is Easy

November 14, 2017

We have finished installation of approximately 250 iBeacons for mobile app positioning. Although the installation process is easy. There are some tricks and common practises to follow, when setting up iBeacon based indoor positioning.

iBeacons installation

iBeacons are cost effective indoor positioning devices, that are really easy to install. As each iBeacon has it’s own battery, that can last about a year, then there is no need for external power supply. Devices are very light, so it is possible to mount them by using double-sided tape.

Even though the installation of one iBeacon is a simple matter. Overall installation process can be quite long and somewhat physically exhausting due to the constant climbing up and down the ladder/platform.

At first glance it might seem that the device will disrupt the look of the building. But, as we can see from the image below, if you take into consideration the overall theme and look of the building during choosing of the device, it merges into the plethora of different sensors and equipment covering the ceiling.

Installing iBeacons

Before installing devices. It is important to mark down the specifications for each iBeacon device. Each iBeacon has it’s parameters: unique ID, name and range.

It is also a good practice to mark the iBeacons. So that you know you’re installing the correct device to the correct location. For this we used a label printer.

iBeacon

Plan before iBeacons installing

It is good to have a plan before physical installation. We used the map of the building to first draw a layout of the placement of the devices and their coverage area. It is a common practice to have a minimum of 3 iBeacons covering any part of the mappable area for the navigation to work efficiently.

iBeacon coverage map

Configuring iBeacons in 3D Wayfinder is also easy. Just create a node with type “iBeacon” and enter iBeacon parameters (UUID, Name etc.). To manage all the devices from one place, open “Beacons” from the left-side menu. You can do this prior to the actual installation when you are confident that your layout will work.

iBeacon management

It is highly recommended to install the iBeacons to a height unreachable for the visitors of the building, so no one could easily snatch them. We installed the devices onto the ceiling. For this we used a painters platform that had wheels on them so it is easy to move it around the building. We recommend setting the platform to a height so the person installing the devices could stand up straight and then reach the ceiling without having to stretch too much.

Good time to install iBeacons in a shopping mall is when there are not that many people.

Here you can find more information about using iBeacons with 3D Wayfinder. If you’d like to test iBeacon-based positioning, please submit the request form for demo iBeacons.

« »

New Features in 3D Wayfinder

January 15, 2016

With the end of 2015 and the beginning of this year there are many new features added to 3D Wayfinder. The goal of these changes was to add flexibility to customizing the behavior of the 3D map and wayfinding. Custom models for path, path types, POI options and many more.

In parallel with large customer projects, we have added many new features to 3D Wayfinder. Most of them were requested by our customers and we have added them as features/settings for all our users. Below are listed the most important ones.

Custom models for path visualizationcustom_path_models_wayfinding

It is now possible to choose your own custom models for path visualization. Path models can be different kind of arrows, footprints or simple tubes/lines. Changing path visualization models can be done under settings.

In near future we’ll add some sample path models also to our blog.

Path types and accessibility paths

It is now possible to add different kind of inaccessibility attributes to the path . This can be used for defining paths  that are also accessible with wheelchairs and/or baby strollers. This also enables defining other kinds of areas, like paths for service personnel etc.

Currently it has to be entered to the node attributes in json object format:

{

“inaccessibility”: [

 “wheelchair”

]

}

wheelchair_wayfinding_inaccessibility_Path_types_and_accessibility_paths

The nodes with these kind of restrictions cannot be used for path finding with “wheelchair” option. It is useful to set these restrictions for stairs or doors.

To use the inaccessibility in user interface, you have to change the accessibility option first:

this.wayfinder.accessibility = “wheelchair”;

Then it is possible to use the same show path method:

this.wayfinder.showPath(poi.node, poi);

And after showing path, just change the accessibility option back to blank:

this.wayfinder.accessibility = “”;

Also check out our blog post about how to set up time dependent navigation rules.

POI specific options

Advanced_POI_settings_specific_options

It is now possible to create special settings for each POI (location). These settings can be chosen from the list of all POI settings, like the size of the billboard image or billboard text size, highlight color, activation radius, billboard height etc.

This feature allows to customize the map by locations, for examples larger shops can have larger texts or text colors can be set by each shop. Also it makes easier to use logos or icons on the map, as the billboard images don’t have to be the same size anymore.

In the future it is possible to add new settings that can be used when developing your own template.

Top-down view for Path showing

path-top-down-view-for-path-showing

Now there is a simple option under settings to turn the map to top-down view when showing the path.

In general it is not a good idea to show the “You are here” location from top-down view, but rather  from certain angle (especially when it is possible with real 3D models as in 3D Wayfinder), which provides a better overview of the map and also makes the map look better.

Now when using the same angle, as displaying the “You are here” location, and visualizing the path, it may happen that the visualized path might not be visible. This is due to tall objects like walls that might block the view of the path. Using the top-down view during path visualization solves this problem.

Pause options between changing floors

According to valuable customer feedback, the transition of switching floors happens too quickly , which might be a bit confusing for the end-users. We solved this issue by adding the “pause-time” option to the settings. With this option it is possible to adjust the duration of the pause before switching to the next floor. The pause duration can be defined in seconds,  which makes it easiest to find  the proper delay that helps  all wayfinder users to understand, which floor they have to go to.

Kiosk view enhancements

In addition to being able to save the view angle, it is now possible to save the zoom factor for “kiosk view”. By clicking the “You are here” button, the map assumes the “kiosk view” saved in the editor.

In the future we will add this view option as a separate object so the view can be linked with any location or node.

« »

Towards Rule-Base Wayfinding

September 25, 2015

Future in wayfinding includes definitely possibility to create complex rules for path finding. Now there are also node restrictions in 3D Wayfinder to specify working days etc.

One of the last addition to 3D Wayfinder was node weights for calculating optimal paths. This made possible to guide visitors in some recommended way. Now there is also possible to restrict some nodes based on time and day.node_restrictions_wayfinding_paths_by_date_and_time

In many public buildings, there are rules for locking doors, elevators or gates. There can be different areas open during working hours than weekends or night times. This is common for shopping malls, train stations, university campuses etc. Even large office buildings are keeping some doors open during the weekends as there might be service providers like dentists, children playrooms etc. When providing wayfinding to your visitors, it is important to follow the same rules.

With 3D Wayfinder, it is possible now to create path restrictions according to work-day and time. To create this kind of restrictions, just open node attributes under editor.
Under Node attributes in 3D Wayfinder Editor, there can be entered JSON. In future we will provide also special UI for that.

Here is the example that will allow to pass the navigation node from 10AM to wayfinding_paths_restriction_node_attributes9PM:

{
“allowedTimes”: [
[
10,
21
]
]
}

Adding other blocks, you can also specify by days.

We are currently developing also other rule types, like security or accessibility. These rules help to create adaptable and user-friendly way-finding applications which are useful and finally elementary for large buildings.

« »

Welcome Screen for Wayfinding Application and Changing Farme-Rate for FRAK

June 8, 2015

Some of our customers prefer a “Welcome” screen for their wayfinding application. Welcome screens are good way for inviting visitors to use wayfinding, it is also a page where you can show advertisements or welcome text. To minimize the load for kiosks we change the frame-rate of our WebGL rendering engine FRAK. 

wayfinding_welcome_screen

Welcome page is configur as an idle-page, when no one is using wayfinding. Usually it is set to 10+ seconds after idle time, when the welcome screen is displayed. On this view, we are hiding wayfinder map component and directory. When visitor starts to use wayfinding, then welcome screen close and floor plans with directory are activate. Certainly, the welcome screen is also helpful for customers to understand what the screen is about. Also a great way to advertise for businesses located in the mall.

To save the kiosk pc and graphics card (GPU) we set the 3D rendering (see FRAK WebGL engine) also idle. This is important for limiting the frame-rate to a minimum. Frame rate change can be invoke with Engine.startIdle(fps) and return to normal operation with Engine.stopIdle(). See 3D Wayfinder API for specific documentation.

We have also fixed a bug in SmoothOrbitController that made animations oscillate on very low frame rates.

« »